
Light Mastery for Nature Photos (cycles not clocks)
Think in Cycles, Not Clocks
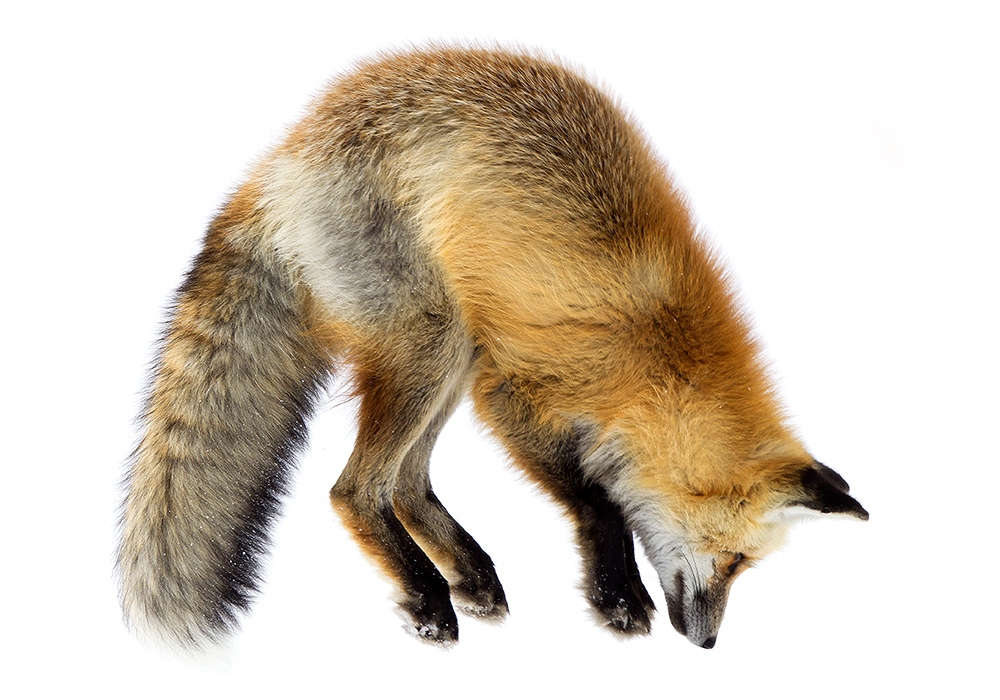
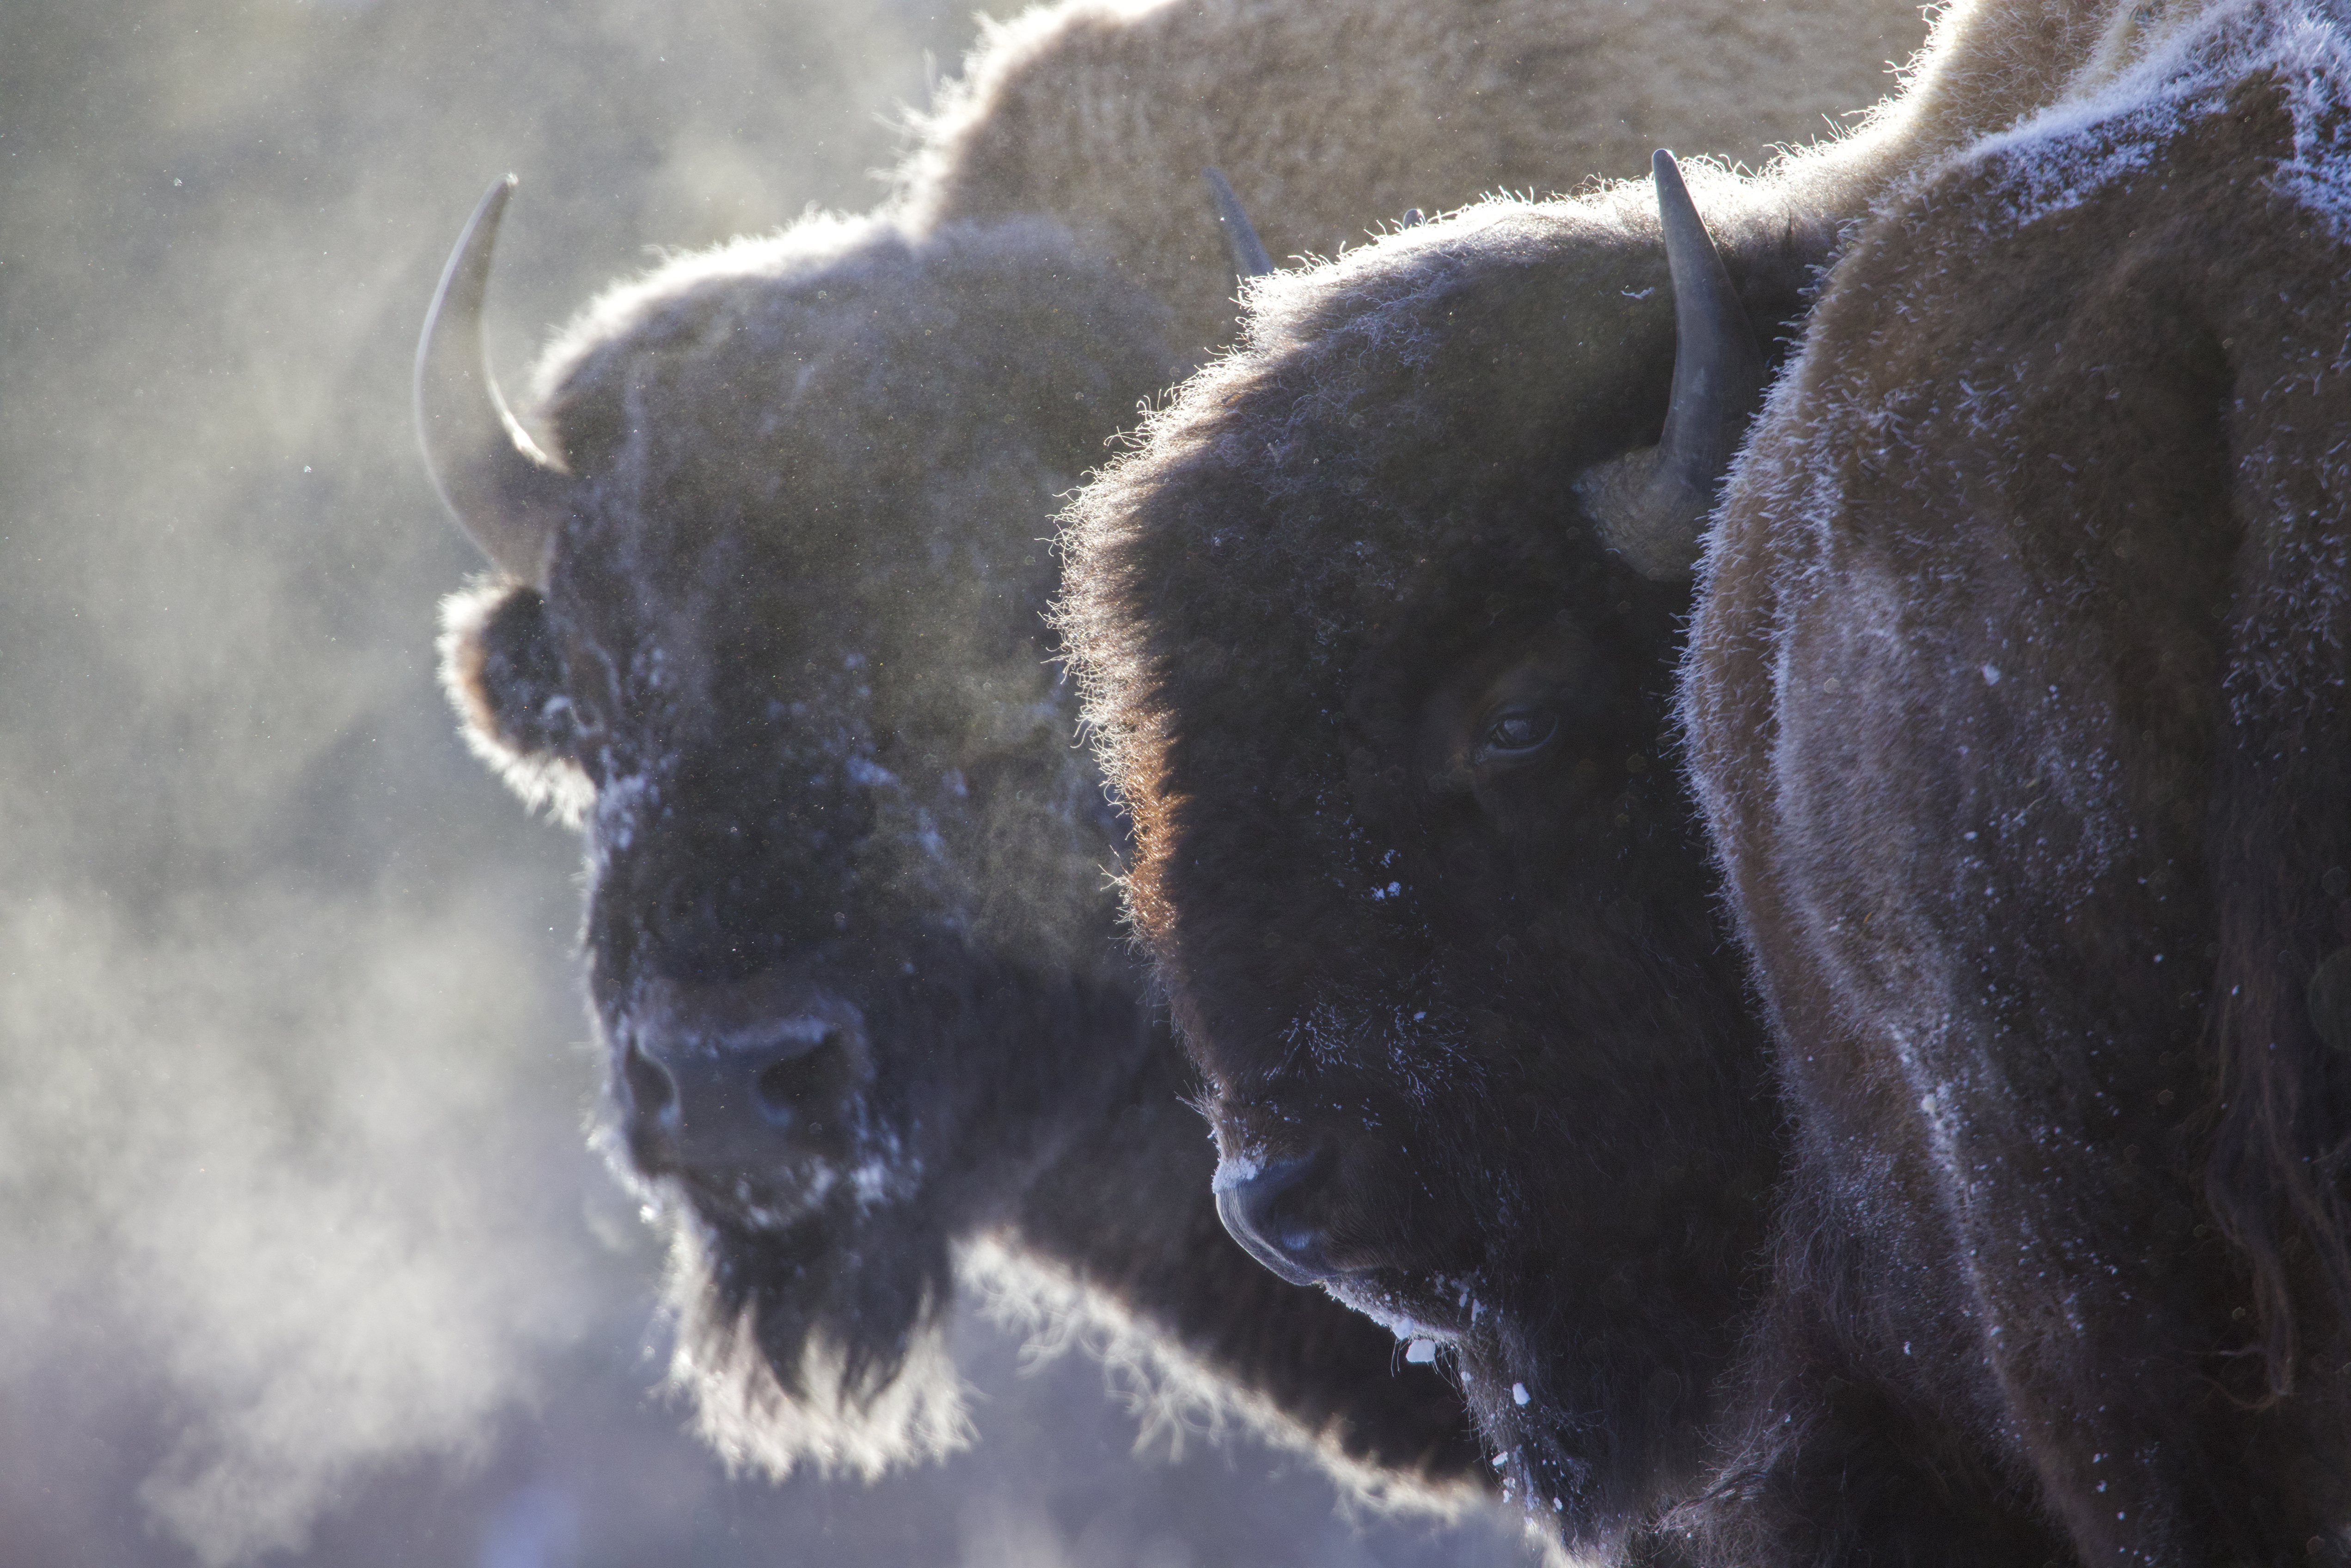
Dawn isn’t a minute on a wristwatch—it’s a transition. The bison above reads alive because several cycles overlapped at once: low solar altitude for backlight, sub-freezing air to reveal breath, and a brief wind lull that let mist hang as particles. At the same timestamp on another day, without those phases aligning, this scene would collapse into ordinary. Light mastery begins by trading “What time is golden hour?” for “Which phase is the land in?” That premise runs through my Nature Code—cycles over clocks.
I plan shoots around phase windows: civil blue hour (cooler spectrum and calm), first rim light (edge definition and breath), and post-sun haze (micro-contrast and warmth). In practice that means arriving one phase early and letting the scene tell me when it’s ripe. This mindset also keeps fieldcraft ethical. I work primarily with an 800mm so I can stack phases from a respectful distance—behavior stays baseline, posture stays relaxed, and the image breathes. You’ll feel that calm through much of my Wildlife Gallery.
Thinking in cycles multiplies options. Low sun carves texture; moisture acts as a giant diffuser; breeze direction sculpts backscatter; snow or dust animates beams. When two or three cycles align—say, a temperature inversion over water during a clearing front—the palette and geometry change dramatically. Instead of chasing a clock, you’re stacking conditions, which is both repeatable and teachable. That’s how I build location playbooks and why similar principles show up in my Living Code essays about daily rhythms.
Cycles also bridge wildlife and landscape work. The same backlight that rims a bison will ignite frost on a treeline or turn waves into specular “stars.” Understanding polarity—backlight vs. frontlight, warm vs. cool, calm vs. wind—is part of the larger framework I outline in the Unified Field Theory. Browse the Landscape Gallery alongside the wildlife work and you’ll see the same phase logic shaping both—the land and its creatures illuminated by the same living clock.
Solar Cycle: Angles, Altitudes & the Character of Light
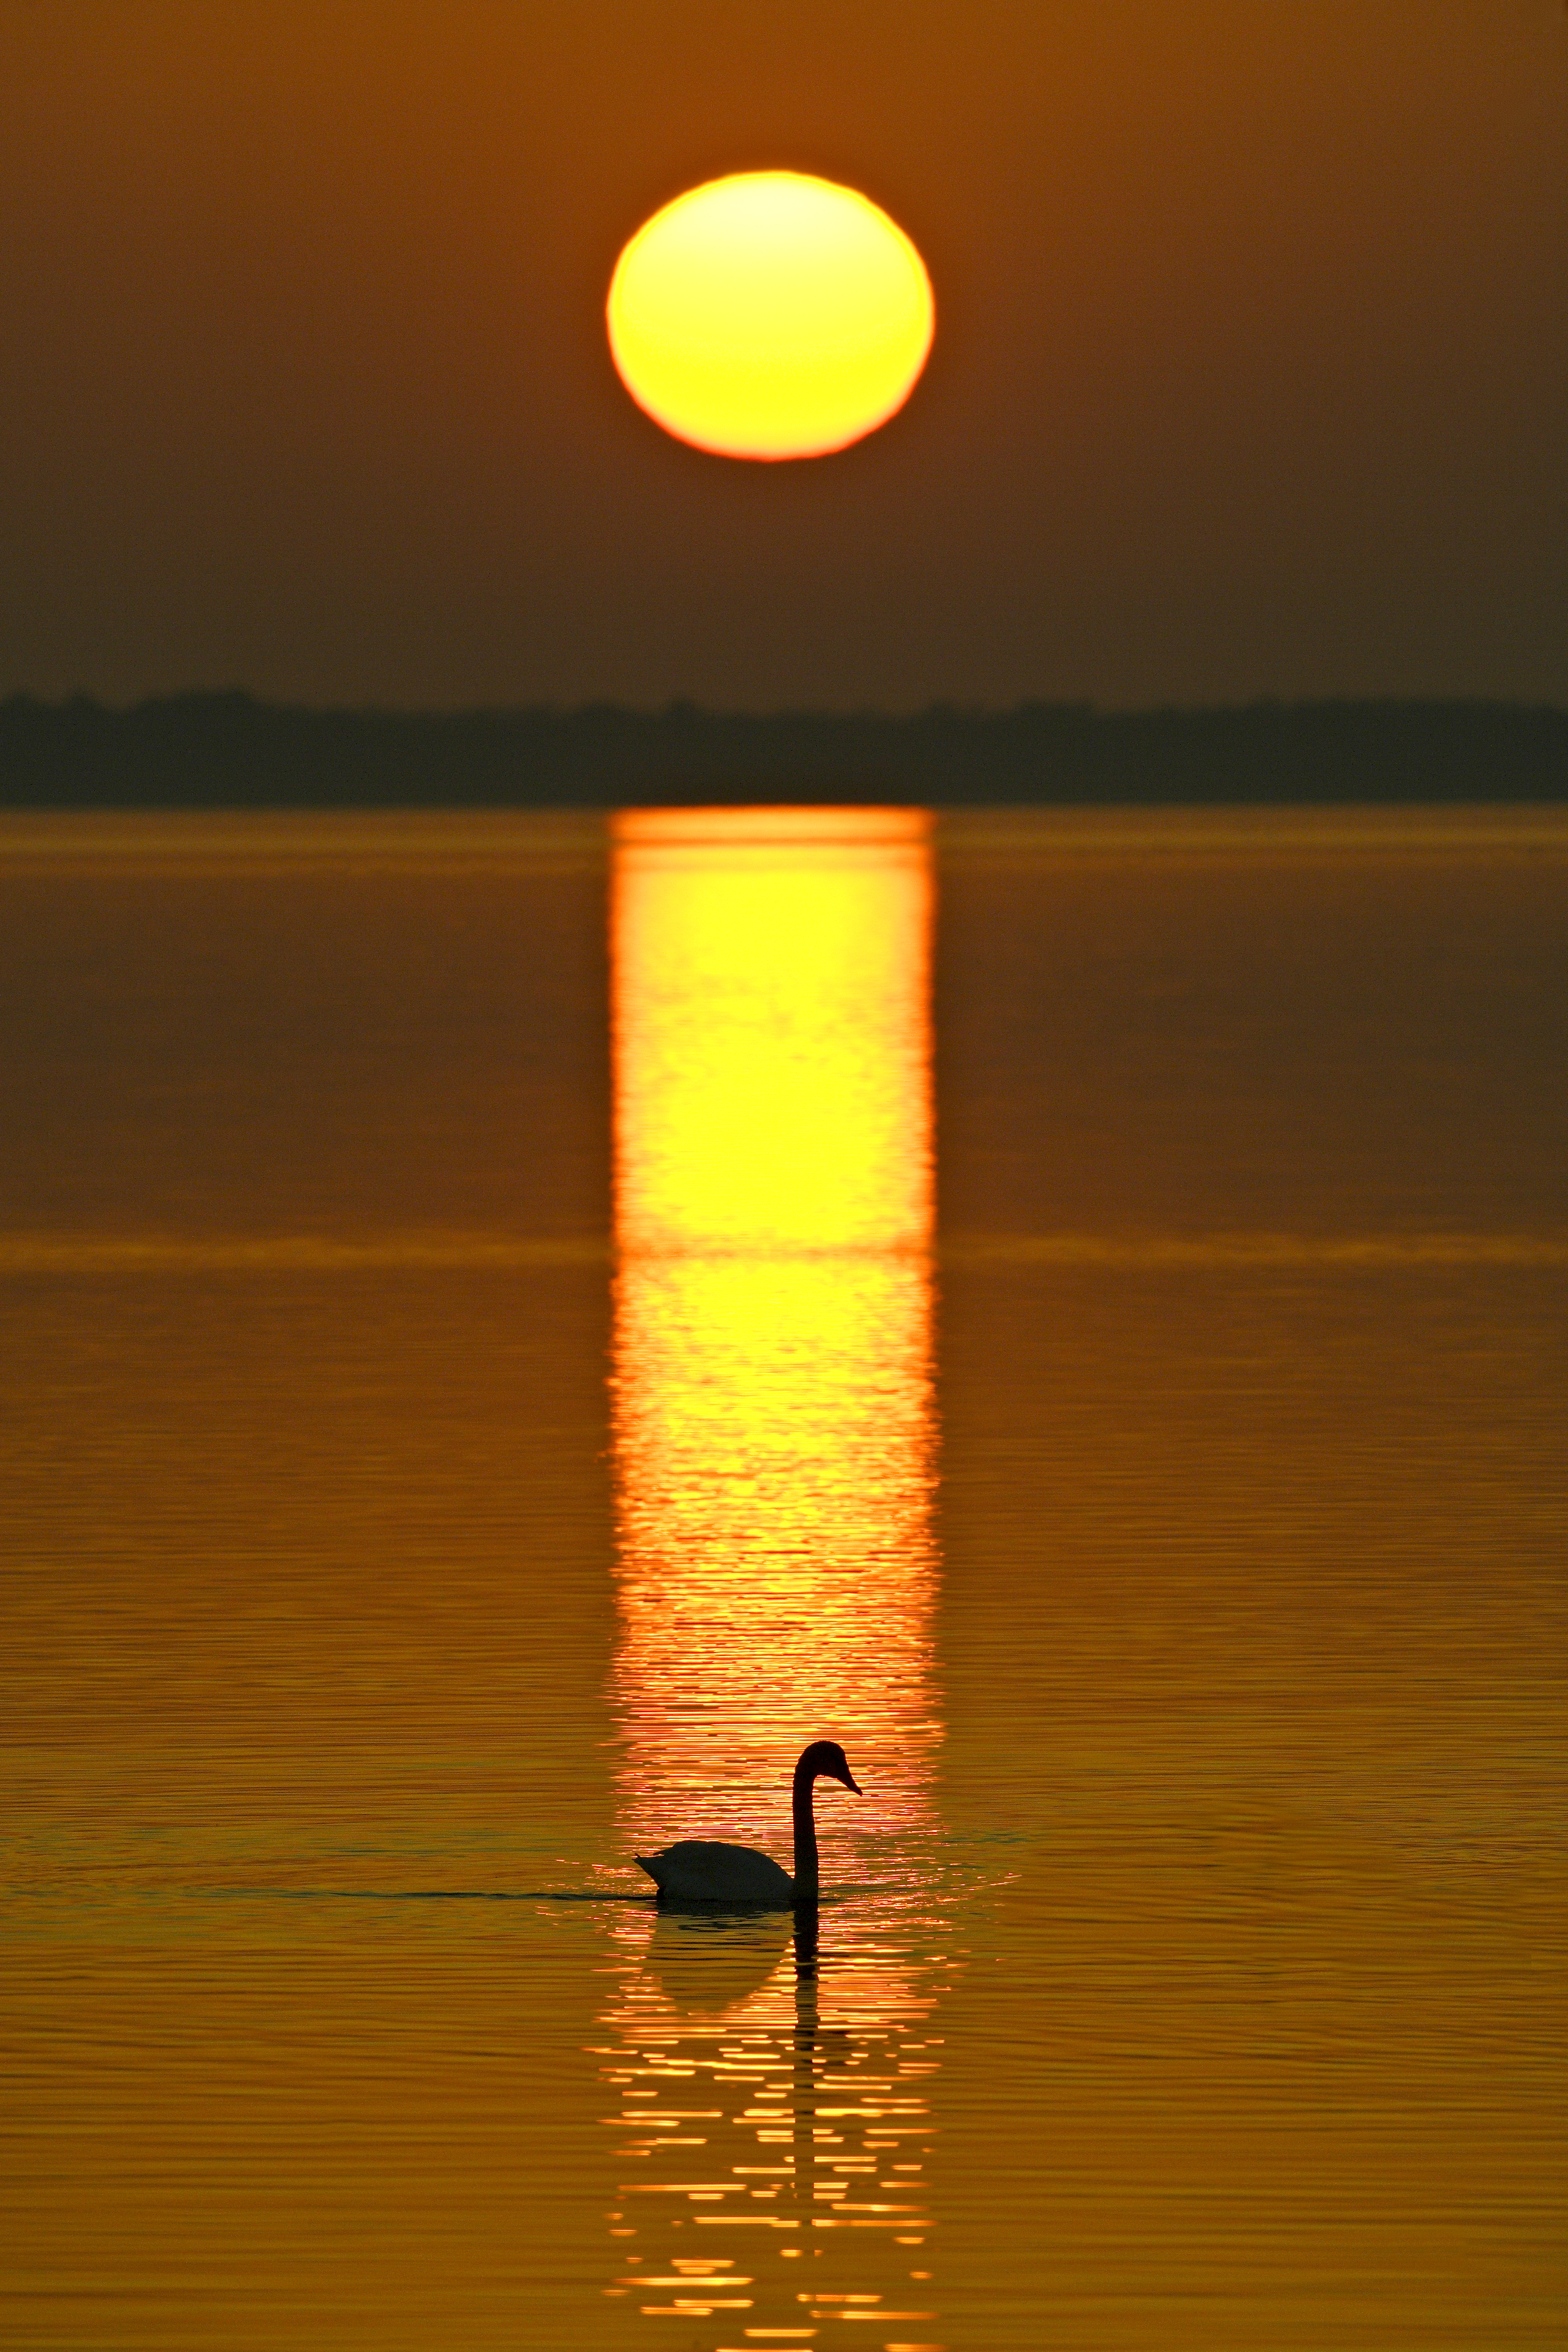
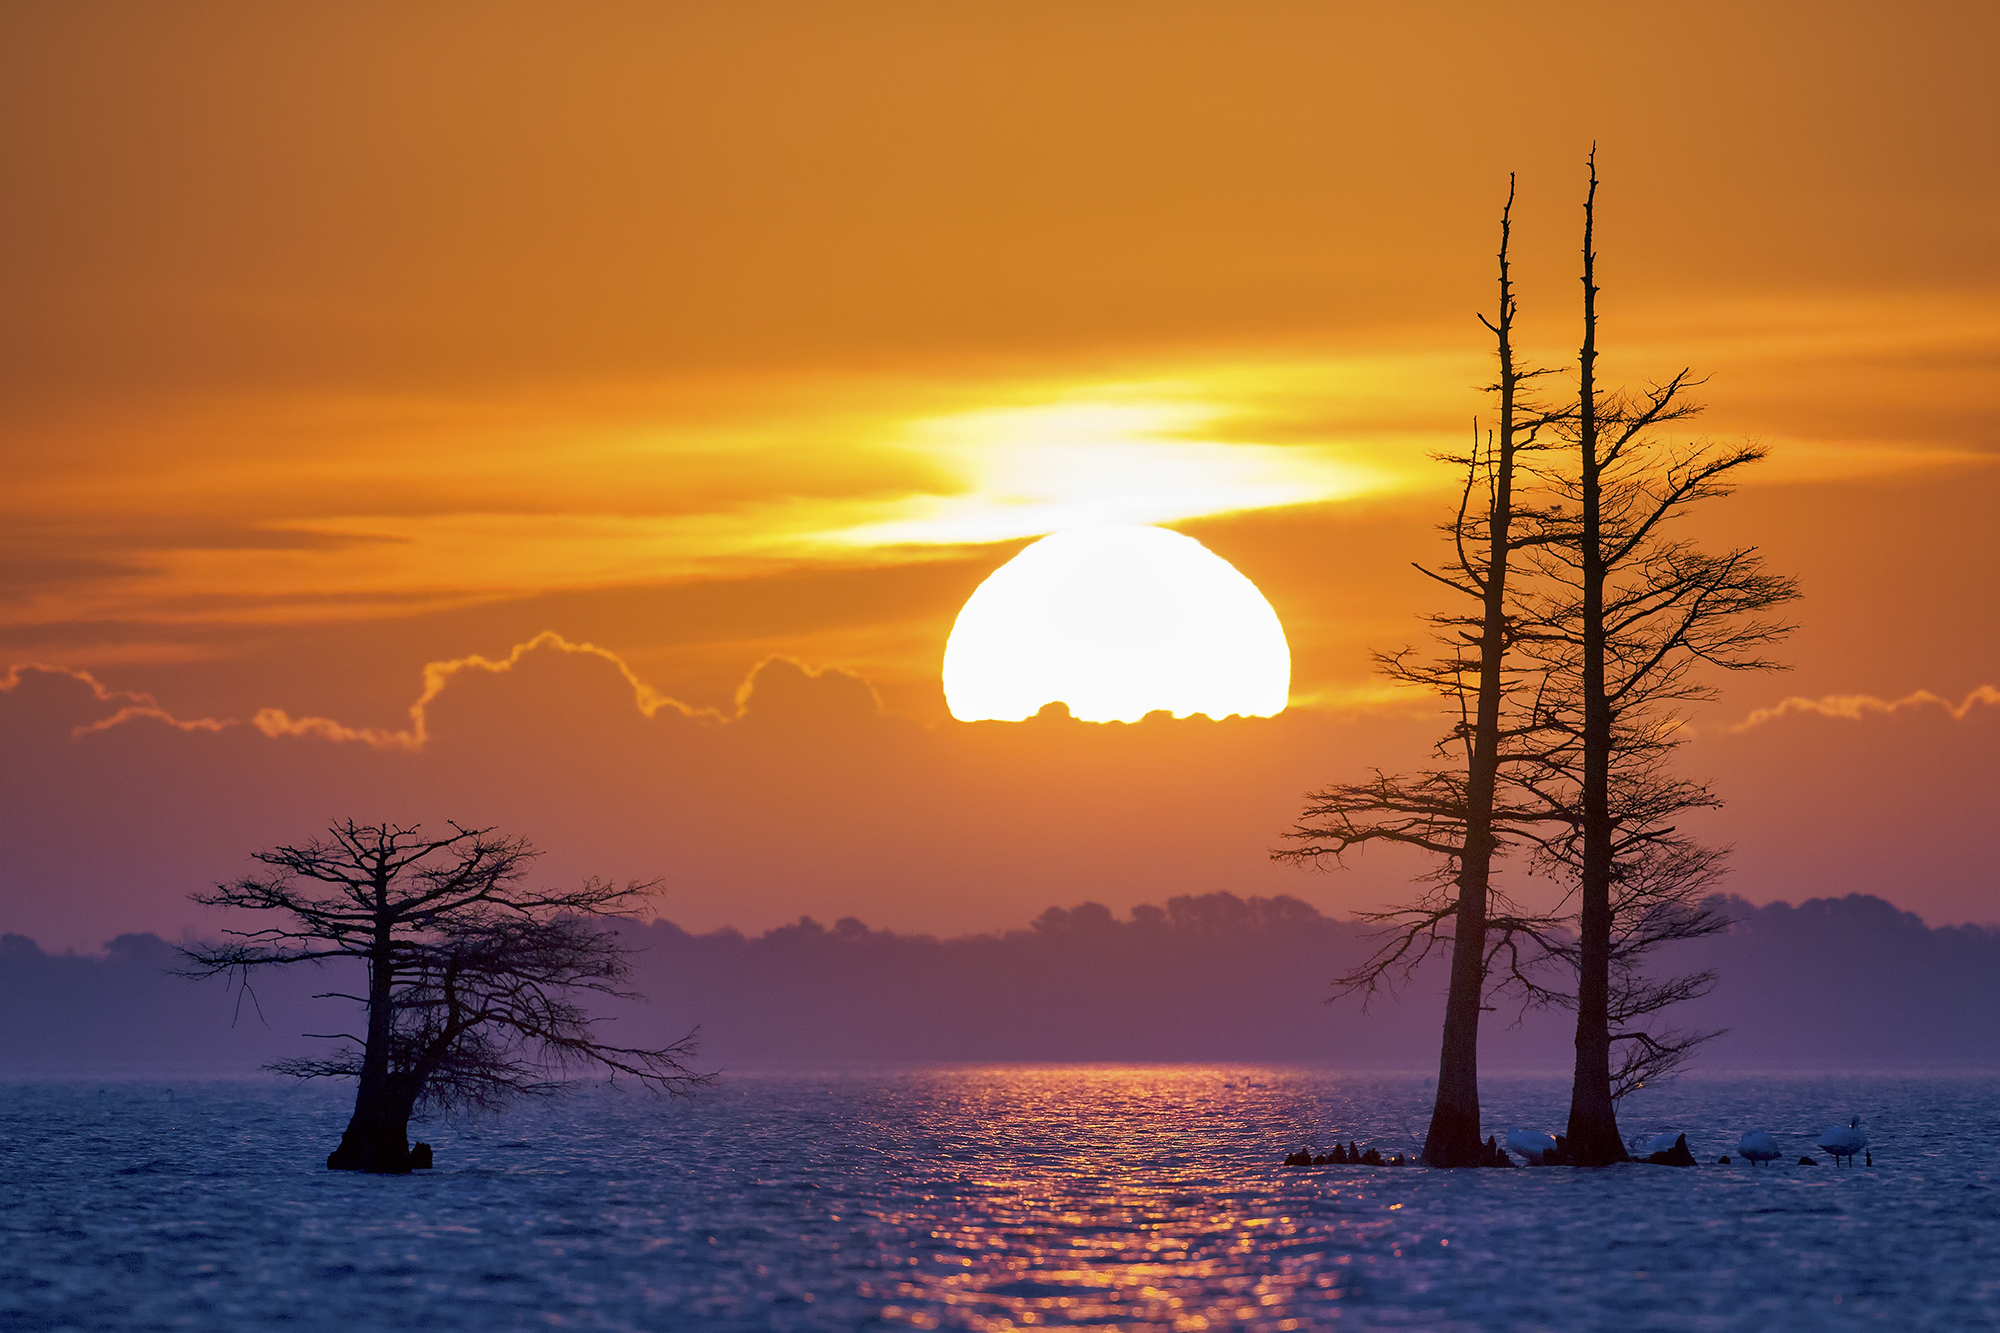
The sun’s altitude is the great mood switch. At low angles, light travels a longer atmospheric path, softening contrast and stretching shadows that carve texture. That’s why this swan reads graphic and serene: a low disc turns the water into a glitter path while the bird drops into clean silhouette. By mid-morning, the same location would flatten—short shadows, higher contrast, and a background that competes with the subject. Thinking in angles—not minutes—lets you pre-visualize the geometry a scene will offer.
A practical field cue: watch shadow length on grasses and shoreline stones. Long, directional shadows mean form and relief for both wildlife and environment. With wildlife, I’ll often hold position at distance (my 800mm does the walking) until the sun drops just enough to rim feathers or antlers. In landscapes, I look for side-lit planes and “grazing light” that reveals micro-textures—patterns you’ll see throughout my Landscape Gallery.
Backlight, sidelight, and frontlight are simply polarities within the solar cycle. Backlight separates form and breath (perfect for waterfowl mist or ungulate fur), sidelight sculpts detail, and frontlight calms behavior studies with honest color. I’ll choose the polarity that matches the story I want to tell, then let distance and angle do the ethical lifting—an approach that mirrors the fieldcraft in my Wildlife Gallery and the cycle-first mindset of the Nature Code.
Field routine: arrive a phase early, pick a primary angle (back/side/front) and a secondary you can pivot to with small lateral steps, then wait for the solar altitude to click into place. When it does, you won’t need to move much—your framing will feel inevitable, and the light will do the storytelling.
Atmospheric Cycle: Moisture, Haze & Particulate
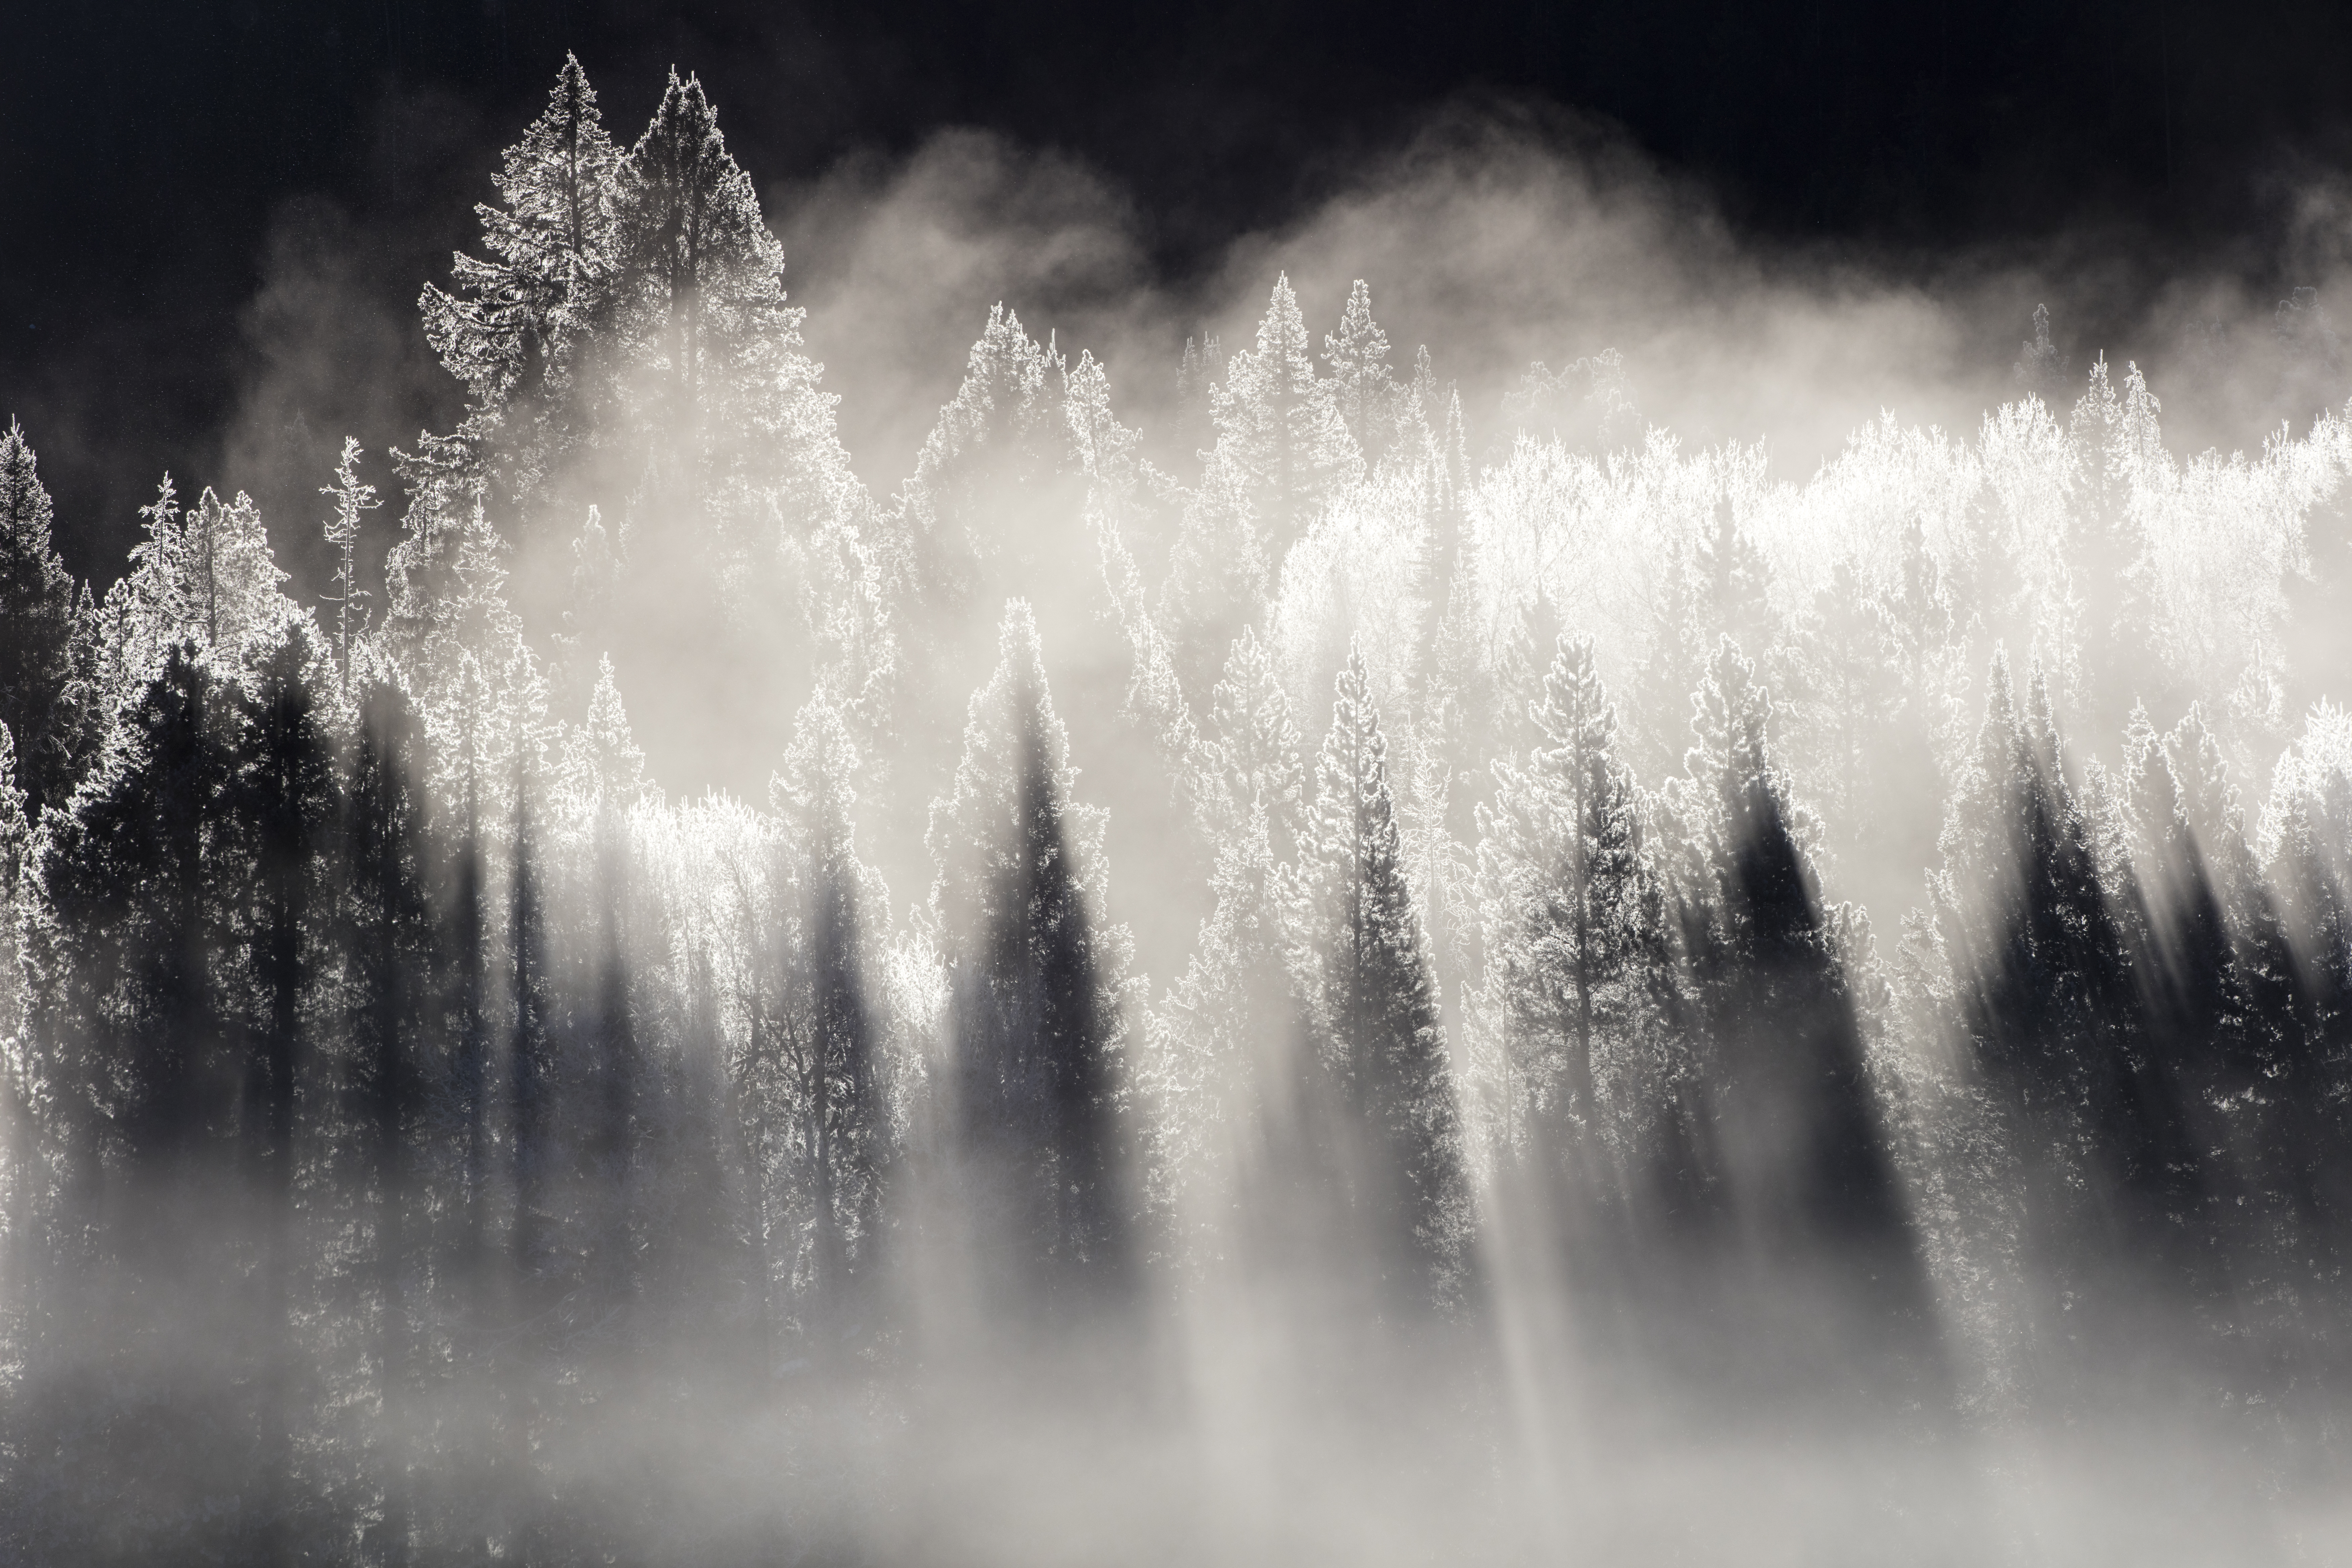
Fog, sea smoke, frost haze, even wildfire particulate—all of it is light geometry waiting to be shaped. Moisture acts as a giant diffuser and prism; it lengthens rays, softens edges, and separates planes so forests feel orchestral, not cluttered. Scenes like this frosted treeline happen when a temperature inversion traps cold air in a valley while first light grazes the canopy. Think “phase stack”: cold + calm wind + low sun = beams. This cycle-first reading is straight out of the Nature Code—watch the phase, not the clock.
Scout the ingredients: (1) water bodies or saturated ground to feed fog; (2) a clear delta T (chilly night, warming dawn); (3) wind forecasts showing a brief lull; and (4) terrain that funnels mist (gulches, river bends, lake coves). Arrive one phase early and pick a perch where the sun can enter the vapor at a slant. I’ll hold my distance—often with the 800mm—so wildlife stays calm; moisture dampens sound and outline, which helps ethics and behavior. You’ll see that relaxed feel echoed throughout the Wildlife Gallery.
Technique tips: expose for the highlight edge of a beam or frosted branch, not the fog body—use a touch of negative exposure compensation to protect structure. Backscatter can bloom; a small lateral step tames flare without losing magic. For autofocus, aim at high-contrast edges (ice needles, rim-lit trunks) or temporarily switch to manual focus and rock gently through the plane. White balance neutral in-camera, then grade cool/warm later to preserve the delicate tonal steps that make prints sing in the Landscape Gallery.
Finally, remember that haze is narrative: river mist means quiet; rime and ice crystals mean bite; smoke adds sorrowful golds and purples. Let the atmosphere choose the mood and compose to amplify it—dark backgrounds behind lit vapor, negative space to let beams breathe, and patient stand time for the cycle to peak. When the phase clicks, the scene reveals itself; you don’t chase it—the light comes to you.
Seasonal Cycle: Sun Path, Vegetation & Color Chemistry
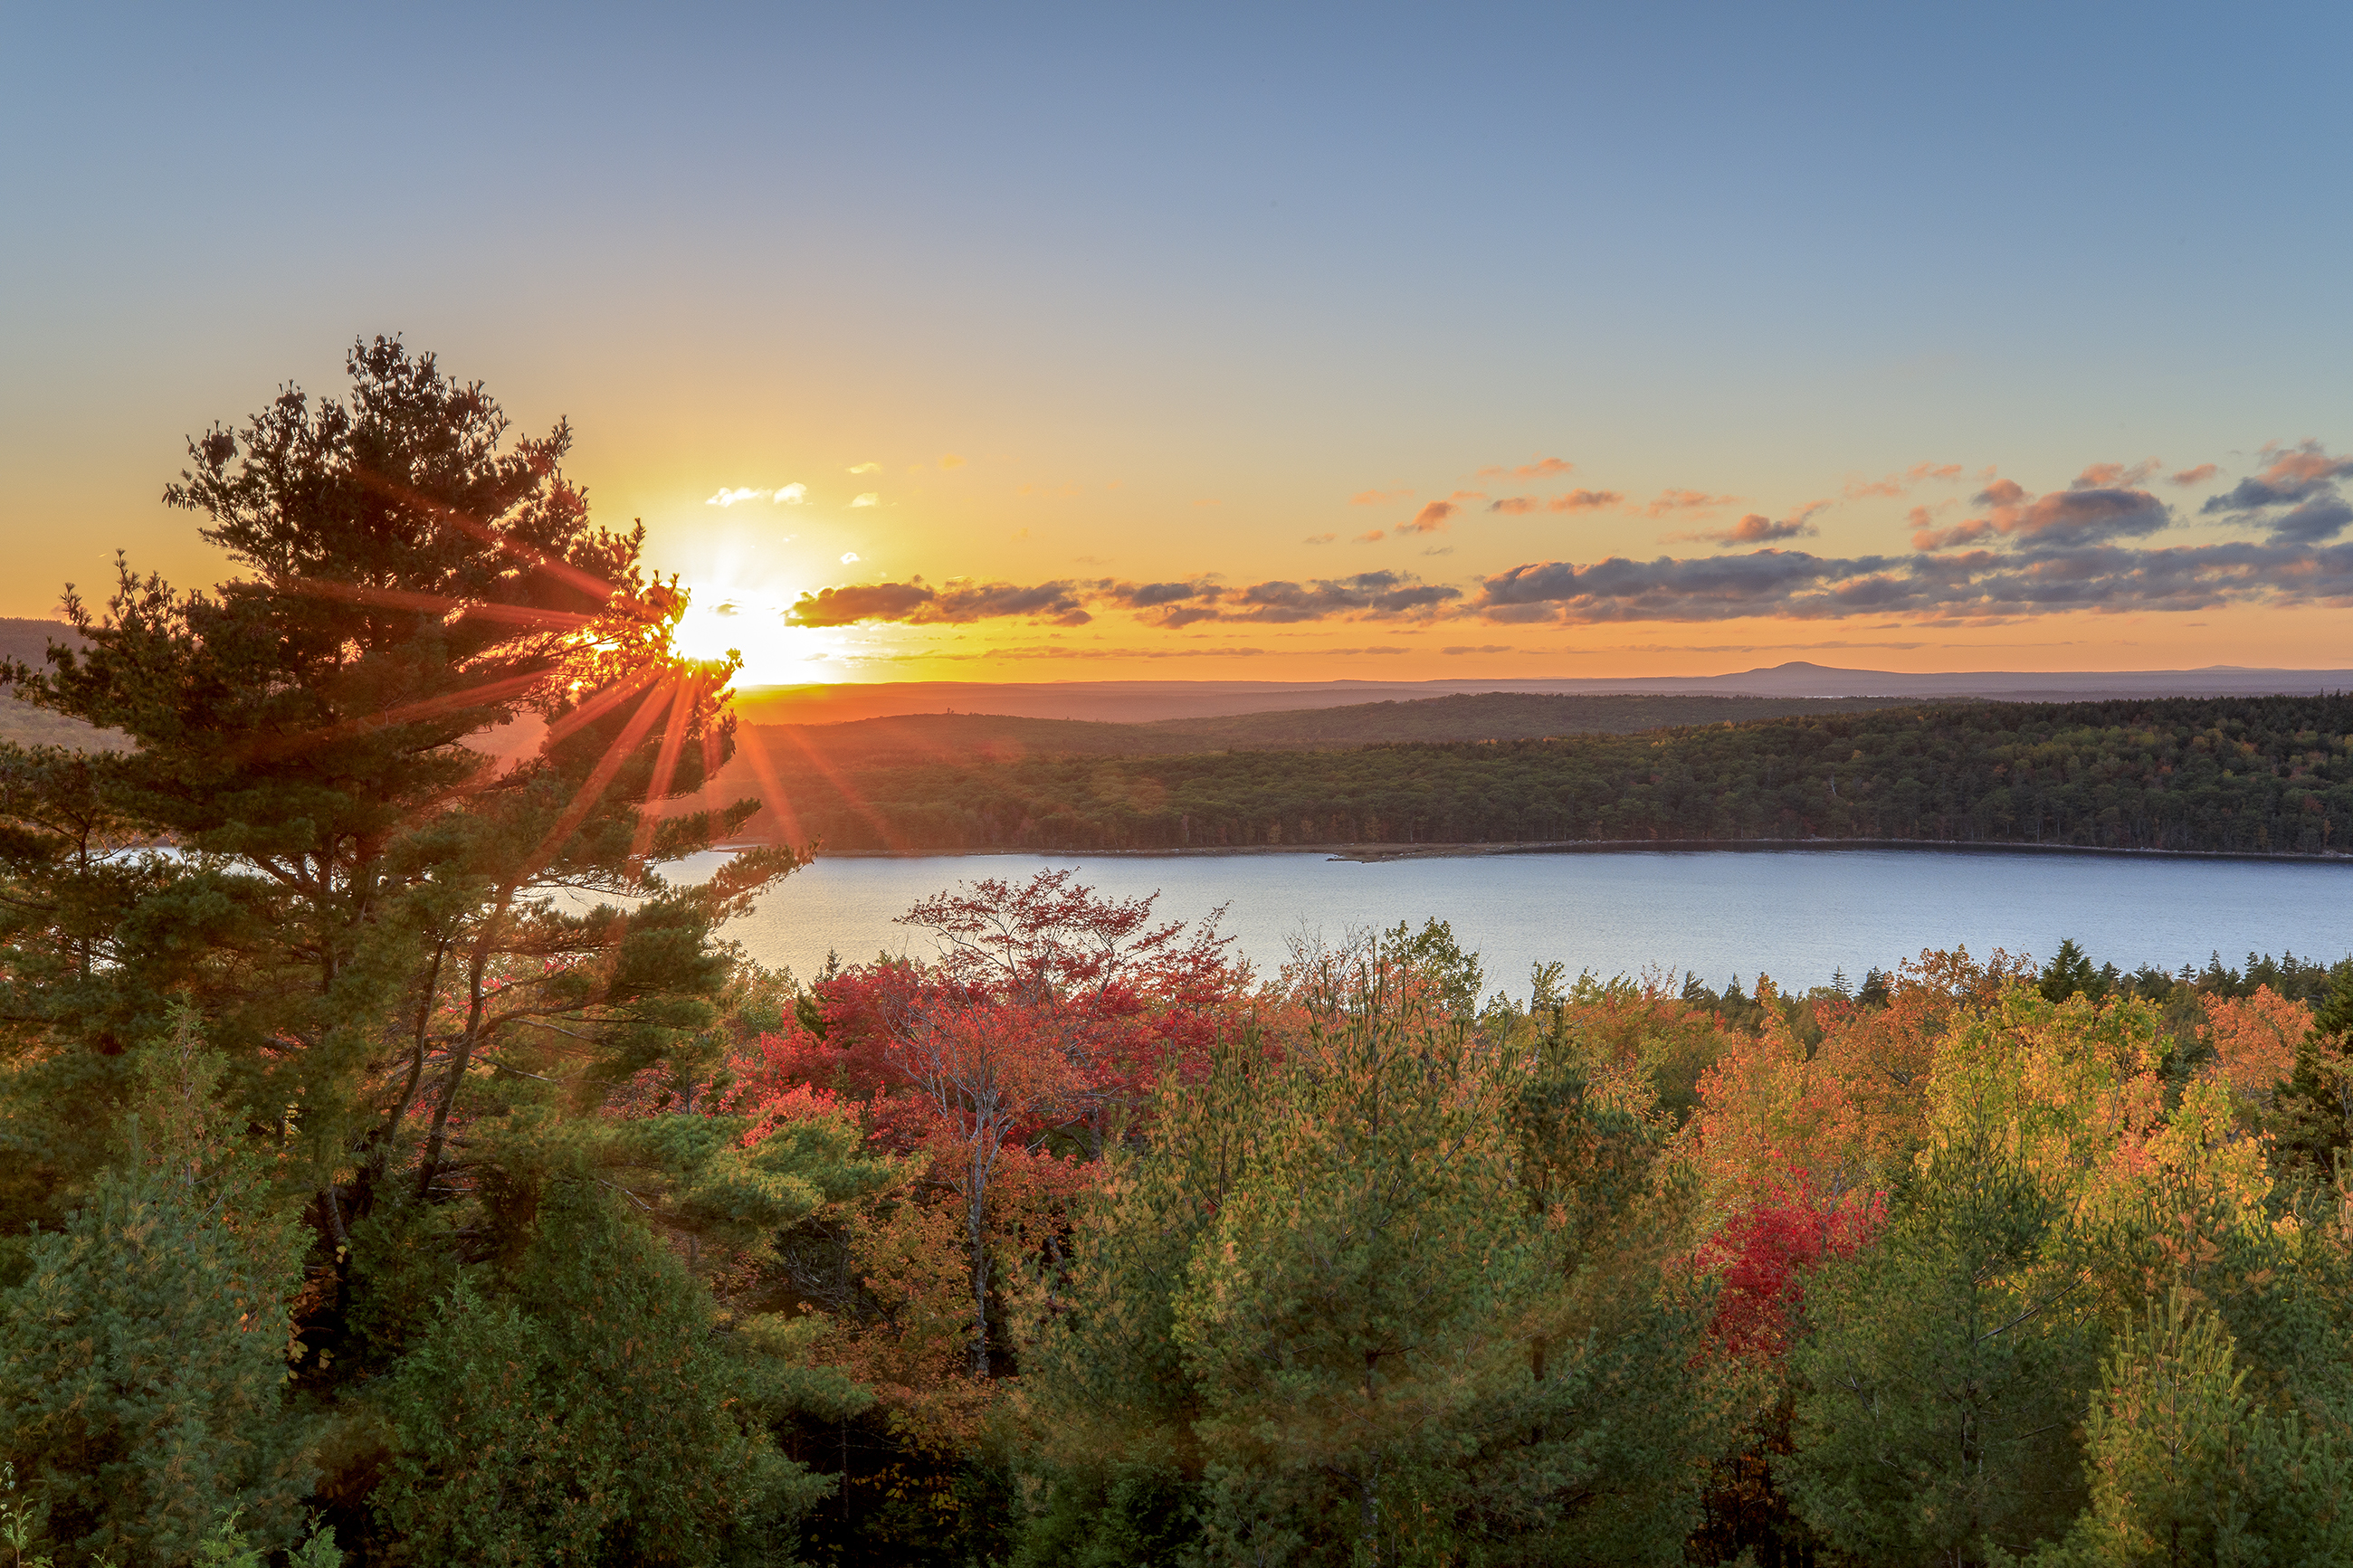
Seasons don’t just change the palette—they move the sun path and therefore the architecture of light. In winter, the sun rides lower and longer, gifting day-length sidelight that sculpts ridges and wildlife profiles. In summer, it arcs high and fast, favoring brief edges at the day’s margins but opening opportunities for bold silhouettes and high-key water. Autumn, as shown here, is a backlight playground: a lower sun threads between trunks and ignites leaves from within. This is the “cycles not clocks” idea from the Nature Code—you’re reading the season’s geometry first, the hour second.
Vegetation is an optical instrument. Chlorophyll-rich spring greens transmit different wavelengths than carotenoid/anthocyanin-rich autumn leaves. Backlighting pulls those pigments forward—blades and leaves turn luminous screens that separate your subject from the background. In forests, I’ll walk the edge of a grove and hunt for leaf translucence—anywhere the sun grazes the canopy at a slant—then wait for a wind lull so micro-veins stay sharp. You’ll see this strategy echoed across my Landscape Gallery, where seasonal backlight becomes the compositional glue.
Wildlife behavior is seasonal, too—rut, molt, migration, denning. Stack behavior windows with seasonal light for narrative coherence. A bugling elk rimmed by September sun or waterfowl feeding in frost haze tells a truer story than a random encounter at the “right time.” That calm reads in the files and in prints throughout the Wildlife Gallery.
Field routine: study seasonal sun azimuth/altitude for your latitude, pre-mark tree lines and openings where backlight can thread, and arrive a phase early to call the wind. If the season hands you overcast, pivot to color-mass abstracts and edge-of-storm breaks. Let the season decide the mood; you compose to amplify it.
Lunar & Tide Cycles: Night Light, Glitter Paths & Intertidal Drama
Moonlight is a moving key light. At fuller phases, it carves edges and makes slow shutters workable; near new moon, the sky deepens and stars dominate. Tides choreograph the rest—exposing mudflats, polishing mirror pools, or building specular “glitter paths” when the moon sits low over water. Instead of asking, “Is it night-friendly?” I ask, “Which moon and which tide?” The intersection of phase, height, and timing turns coasts into light laboratories—an idea straight from the cycles mindset of the Nature Code.
For wildlife, lunar lift can open ethical opportunities at distance—owls hunting along dunes, herons working tide pools, shorebirds chasing receding water. I stay conservative at night: electronic shutter, and slow, deliberate movements from fixed vantage points. If behavior changes, I back off. The goal is to let the scene breathe while the moon does the lighting—an approach you’ll feel across my Wildlife Gallery.
On the landscape side, tie your plan to a tide window that creates compositional options: falling tide for exposed texture and leading lines; low slack for glassy reflections; rising tide for dynamic edge energy. Add wind discipline—0–2 kt mirrors, 3–6 kt sparkle bokeh, beyond that abstract motion. Small lateral shifts align the moon’s reflection with your foreground geometry. You’ll see these principles echoing through my coastal work in the Landscape Gallery.
Field routine: pre-visualize the moon’s azimuth/altitude and the tide curve; arrive one phase early; pick a safe perch above the wrack line; set exposure to protect highlights on the glitter path; and be patient as wind and water settle. When the lunar and tide cycles click, the light composes itself—you simply frame with respect.
Weather Cycle: Fronts, Lulls & Edge-of-Storm Light
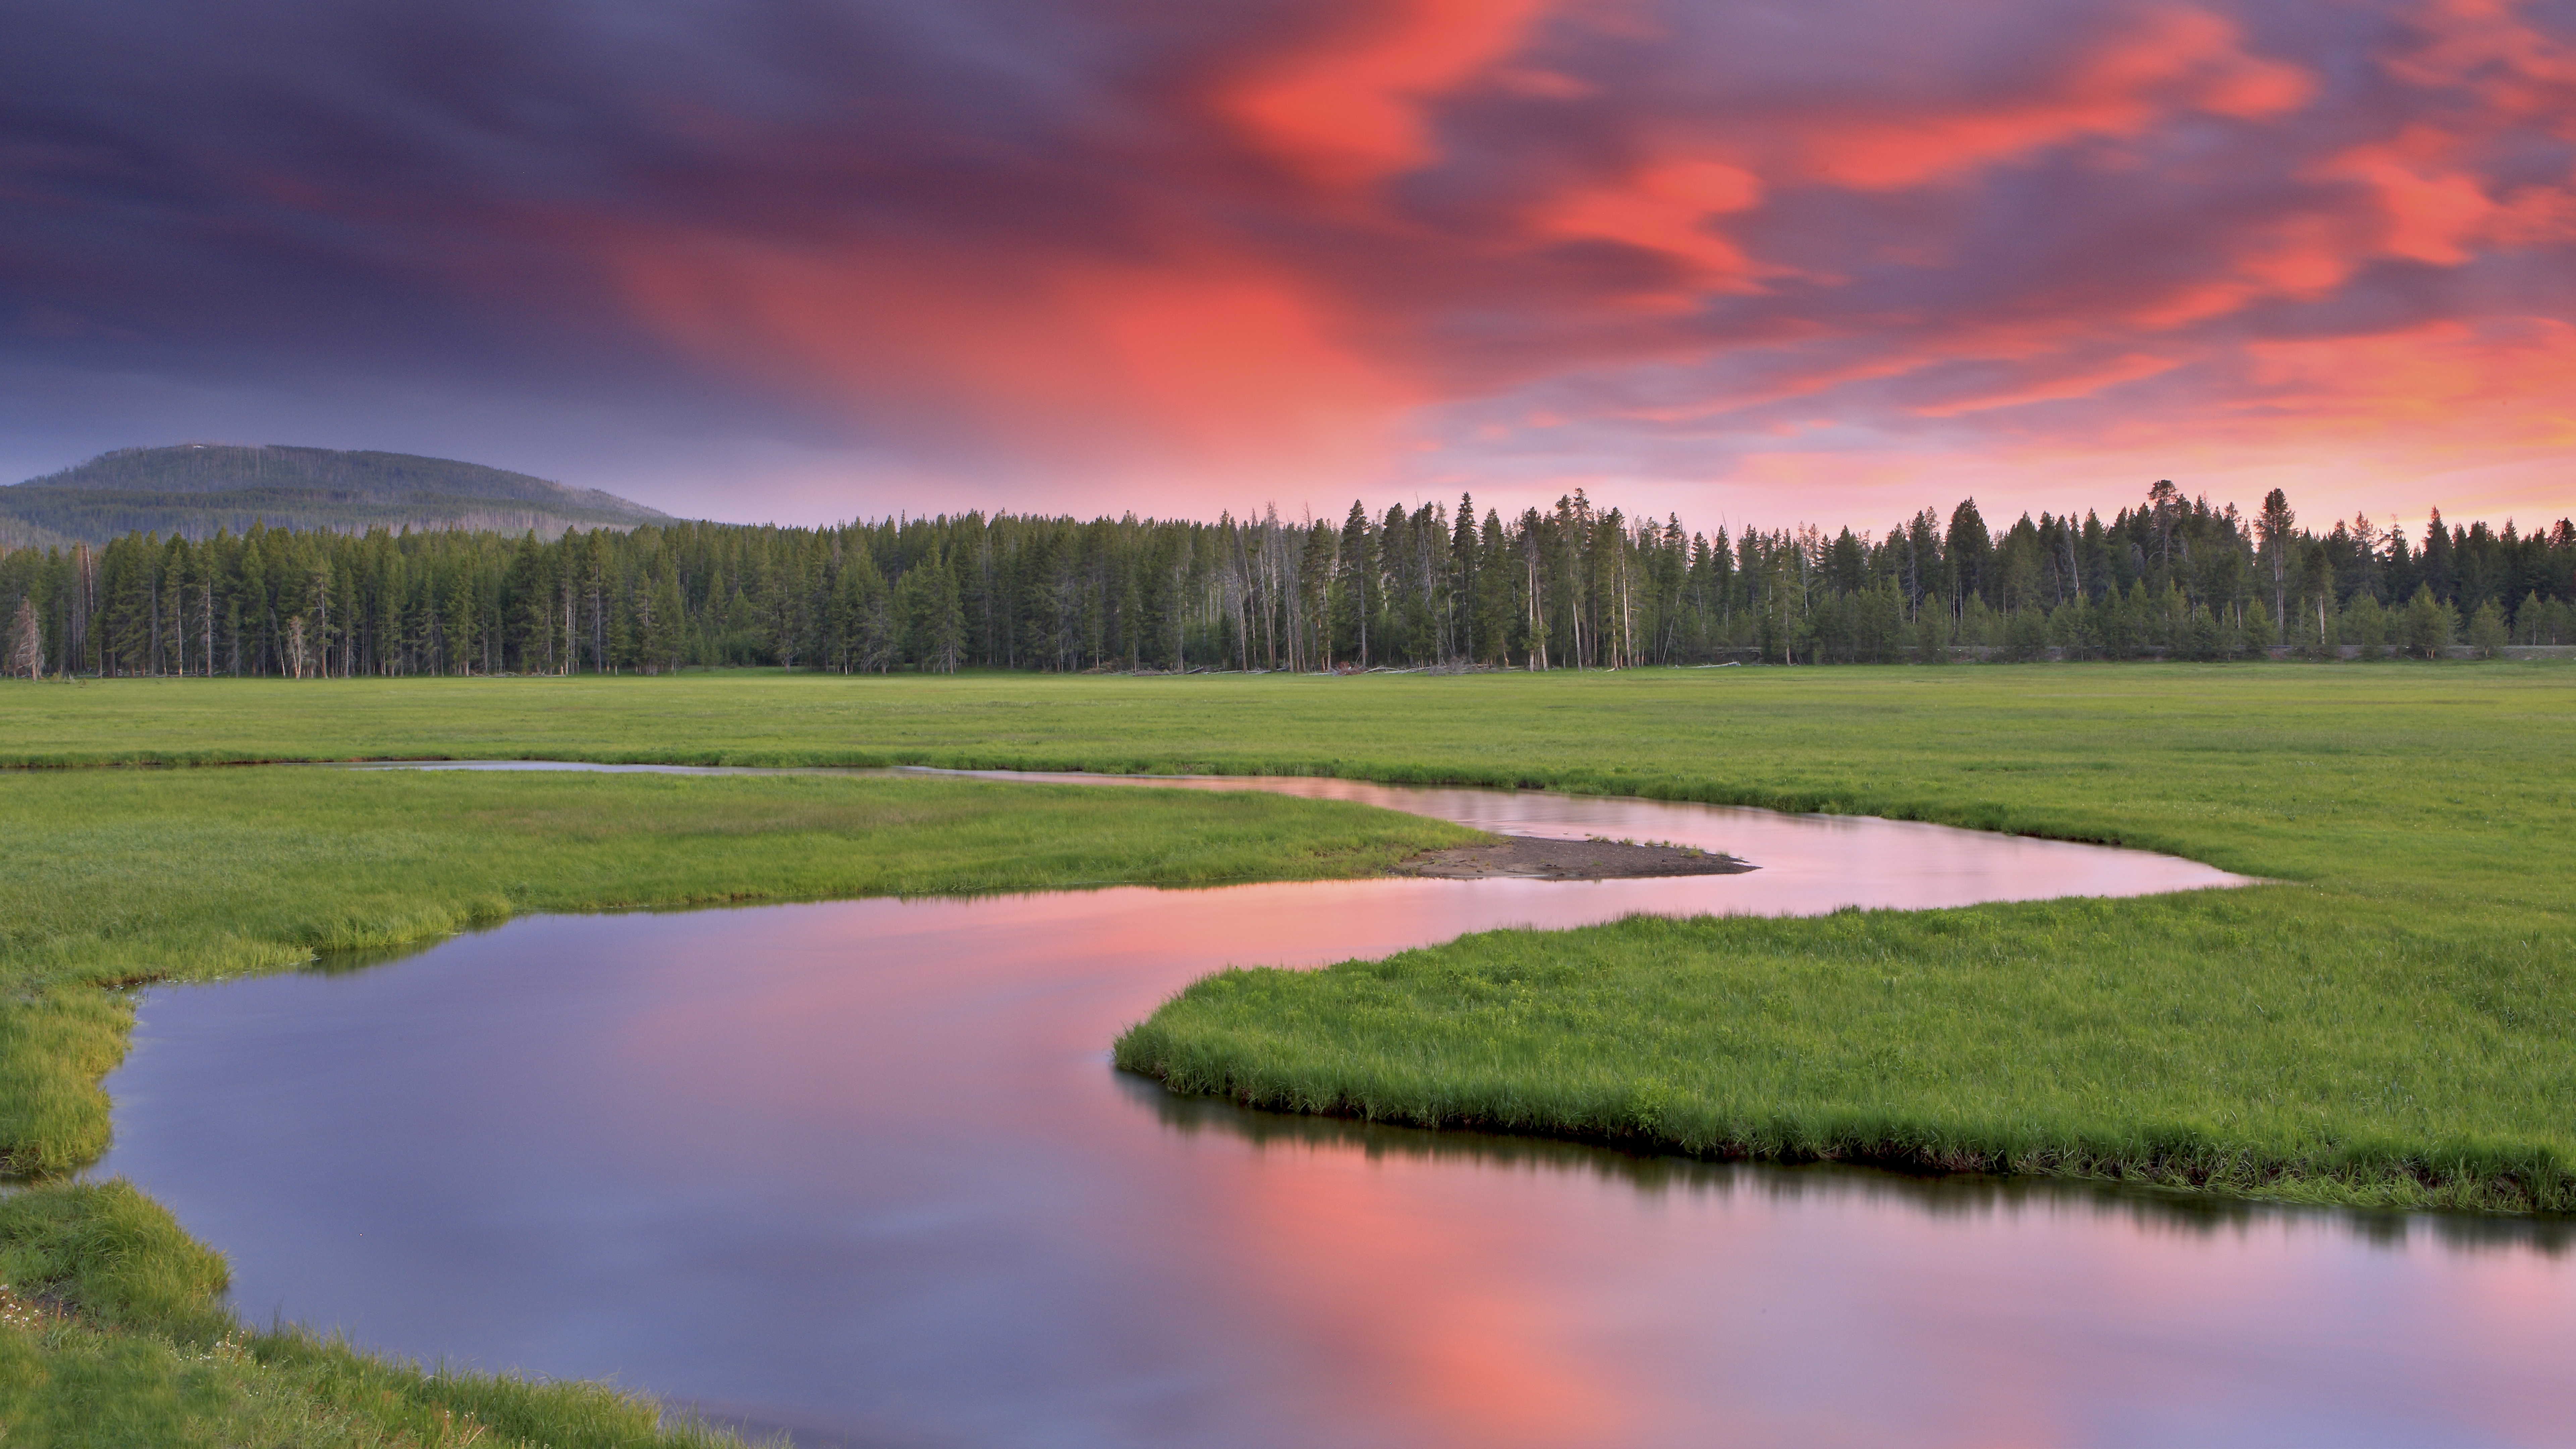
Weather is the composer that rewrites scenes in minutes. The most dramatic palettes arrive at the edges—right before a front hits or immediately after it clears. When the sun slips beneath a receding cloud deck (like this), you get a narrow beam that travels horizontally across the landscape, saturating color and carving relief. Instead of “sunny vs cloudy,” think in phases: pre-frontal, frontal, post-frontal. Each has a look, and only one or two might suit your story—this is “cycles not clocks” in action from the Nature Code.
Two ingredients make or break edge-light: cloud geometry and wind lulls. Watch for a low slot at the horizon opposite your subject; that’s the portal the beam needs. Then factor wind—5 minutes of calm can turn chaos into mirror water or stable grasses. I’ll arrive a phase early, pick a composition that works for both “beam on” and “beam off,” and then wait. You’ll see this patience-first routine across my Landscape Gallery, where edge-of-storm light is a recurring character.
For wildlife, fronts change behavior as much as light. Pre-frontal energy can spike movement; post-frontal chill can concentrate activity in sheltered zones. My ethics stay the same—work from range and let animals settle before you press the shutter. A quick lull is often when both light and behavior align—calm posture, clean edges, and a file that prints beautifully without heavy-handed edits, consistent with the approach in the Ethical Fieldcraft Playbook.
Field routine: track fronts the night before, mark beam windows (sun azimuth + horizon gap), set a composition that tolerates variability, and meter for the highlight edge when the slot fires. If the weather closes, pivot to moody abstracts or rain-polished color. Let the front decide the mood; you shape the frame with restraint.
Polarities of Light: Backlight, Sidelight & Frontlight
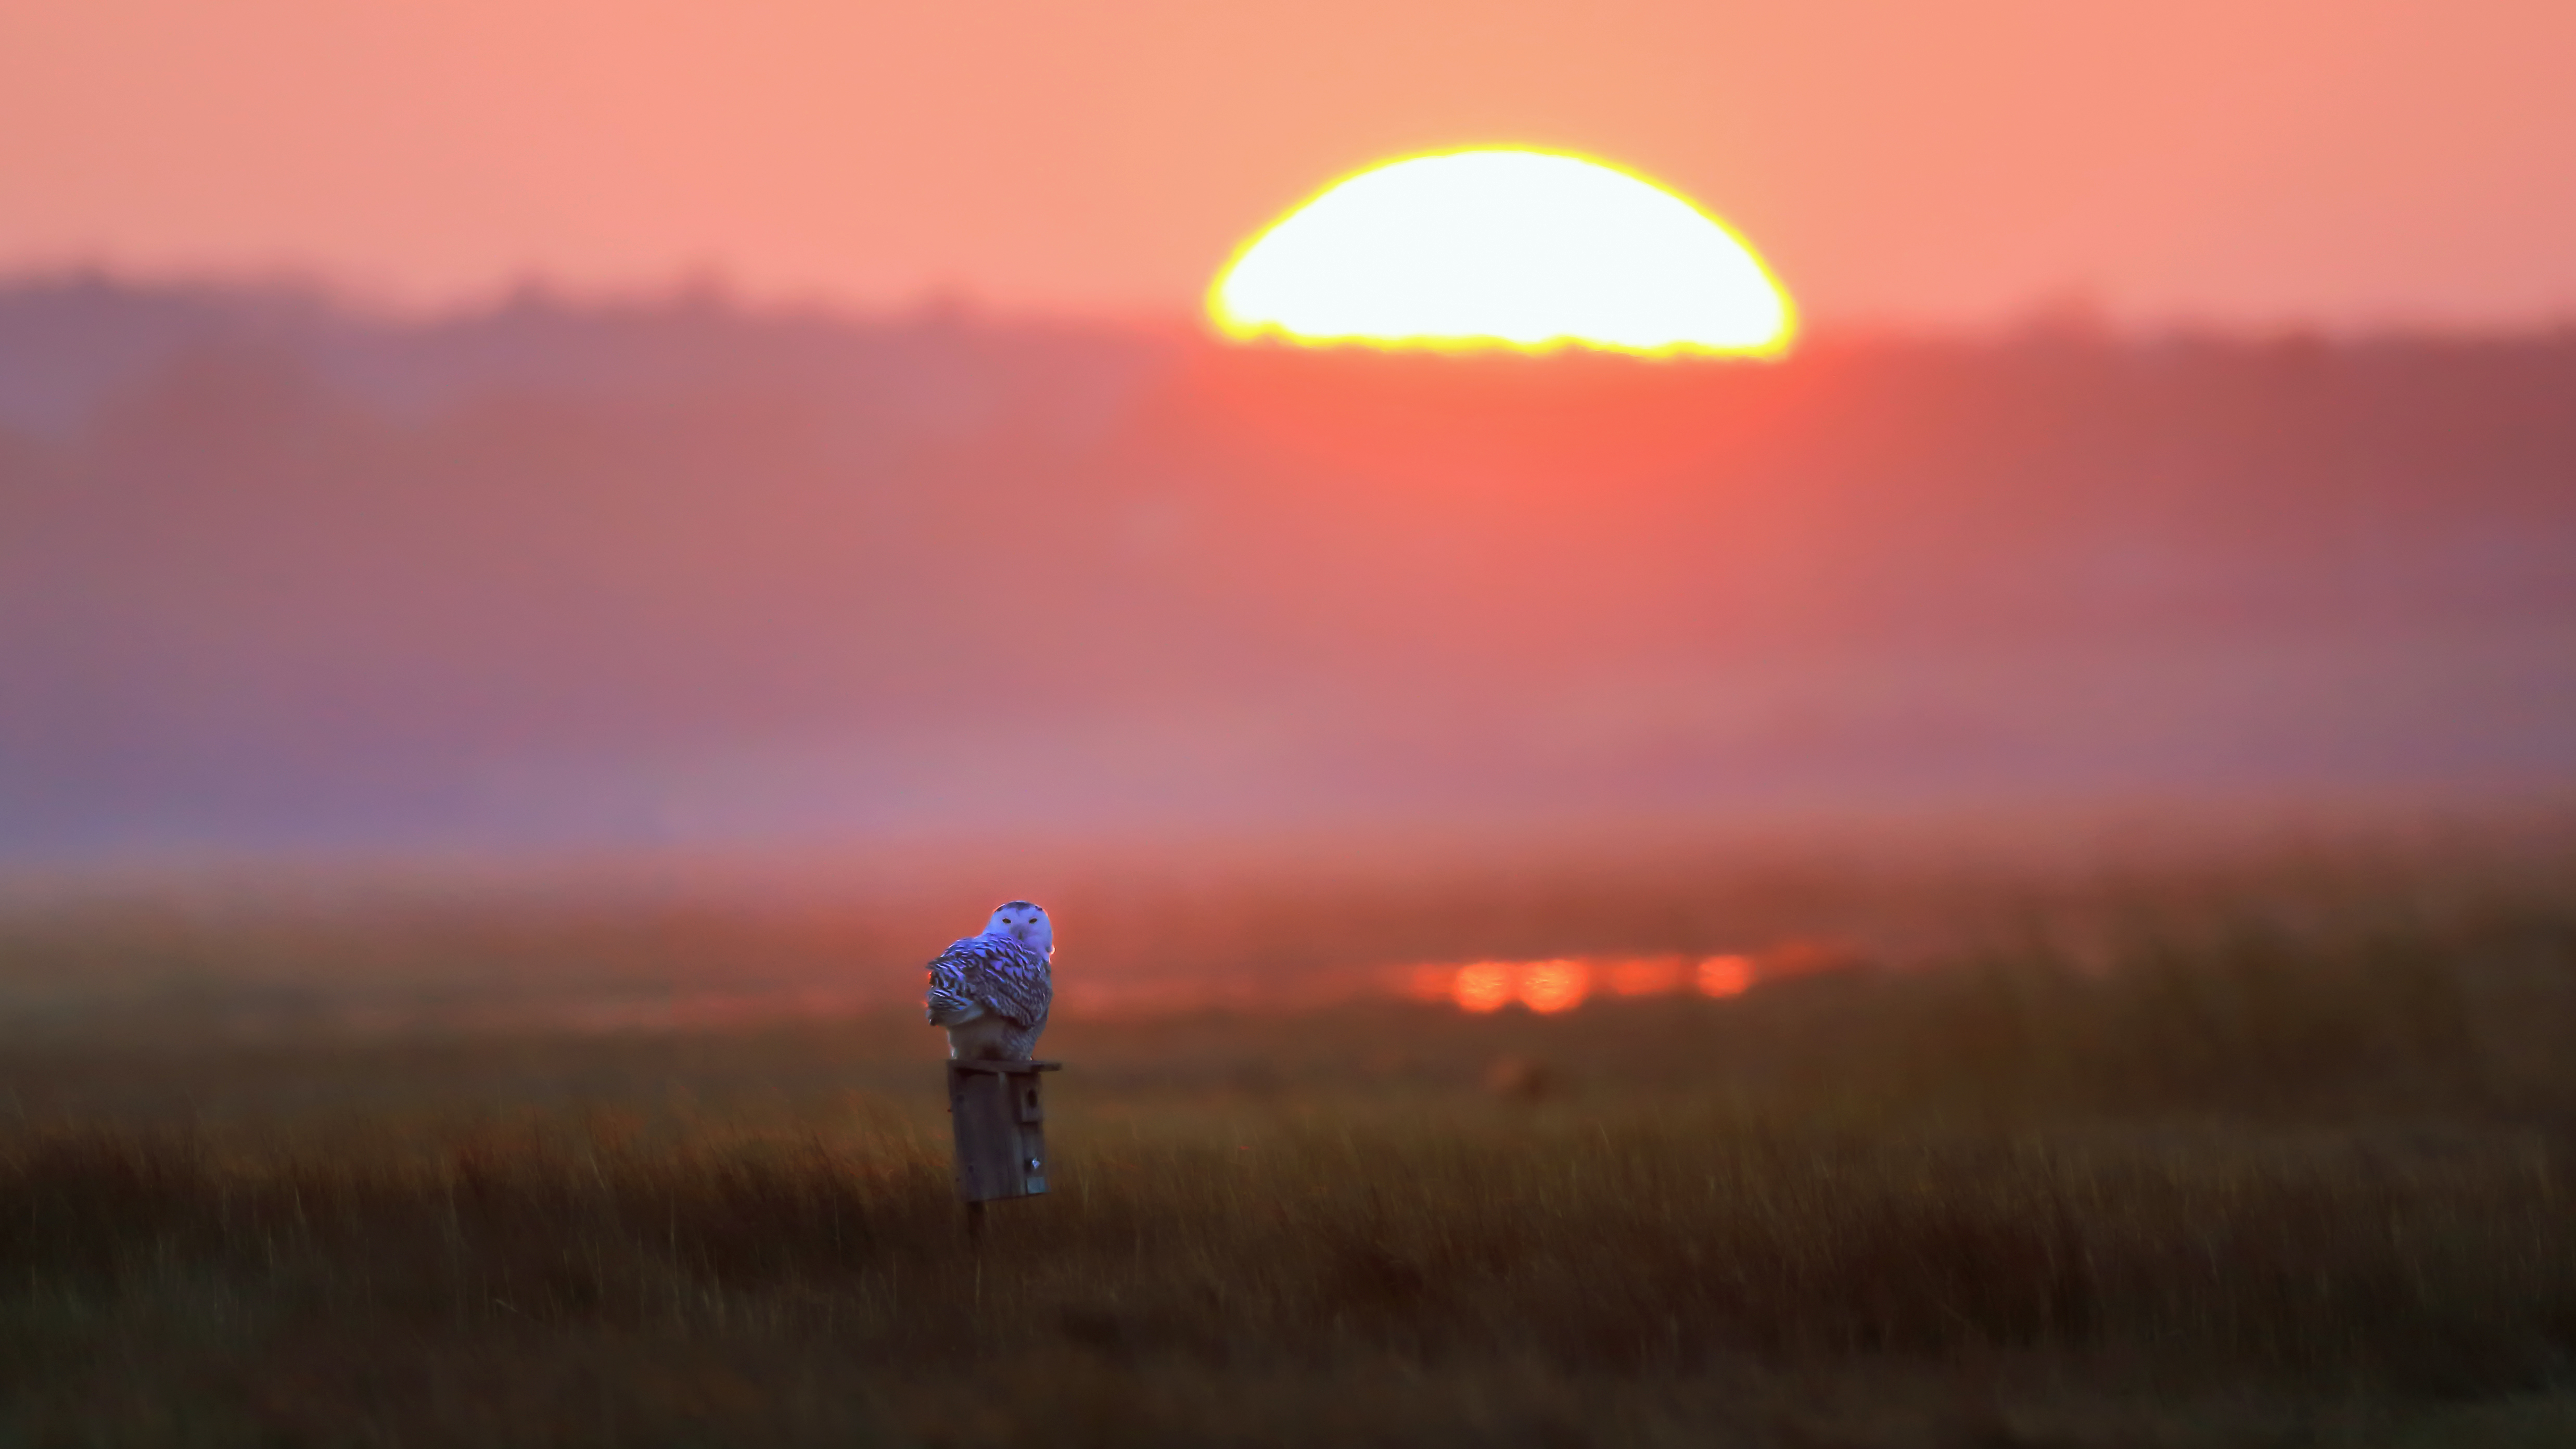
Light has poles—backlight, sidelight, and frontlight—and each carries a distinct emotional grammar. This Snowy Owl is a study in sidelight: the beam crosses the plumage at an angle, carving relief in the feather edges while letting the background fall softly away. Rotate a few degrees and the same scene becomes frontlit and calmer; slide the sun a little farther and you rim the bird with backlight, trading detail for halo. Thinking in polarities means you pre-visualize three versions of the same frame and choose the one that best tells the story of the moment—a cycles-first approach rooted in the Nature Code.
Backlight emphasizes shape and atmosphere: breath, frost, dust, sea spray. It’s perfect when you want mystery and separation—wildlife as luminous silhouette against a darker field. Sidelight is your texture engine, revealing micro-structure in fur and feathers and enhancing topography in grasses, dunes, and bark. Frontlight calms color and reduces shadow confusion; it’s ideal for clear behavior studies and prints that favor tonal cleanliness. I’ll often begin a session hunting sidelight for structure, then pivot to backlight for a few rimmed frames as the sun slides—micro-moves instead of big approaches keep the subject relaxed while the light does the heavy lifting.
Ethics ride inside these choices. Small rotations of the camera–sun–subject triangle—sometimes a stride or two—can flip sidelight into frontlight without moving your footprint or altering the owl’s baseline behavior. That restraint is visible in the file: posture stays soft, gaze returns to hunting, and the image feels unpressured. You’ll sense that calm across my Wildlife Gallery, where intimacy comes from angle and light—not proximity.
Field routine: pick a primary polarity that matches your narrative (mystery = backlight, texture = sidelight, study = frontlight), then establish a secondary you can reach with a modest sidestep. Guard your highlight edges in backlight, watch midtone separation in frontlight, and use a low shooting height to keep backgrounds distant and clean. These polarity shifts echo the broader resonance/polarity principles I expand on in the Unified Field Theory—the same scene, three moods, chosen by how you place yourself within the cycle.
Color Temperature Cycle: Blue Hour, Golden Hour & Neutral Noon
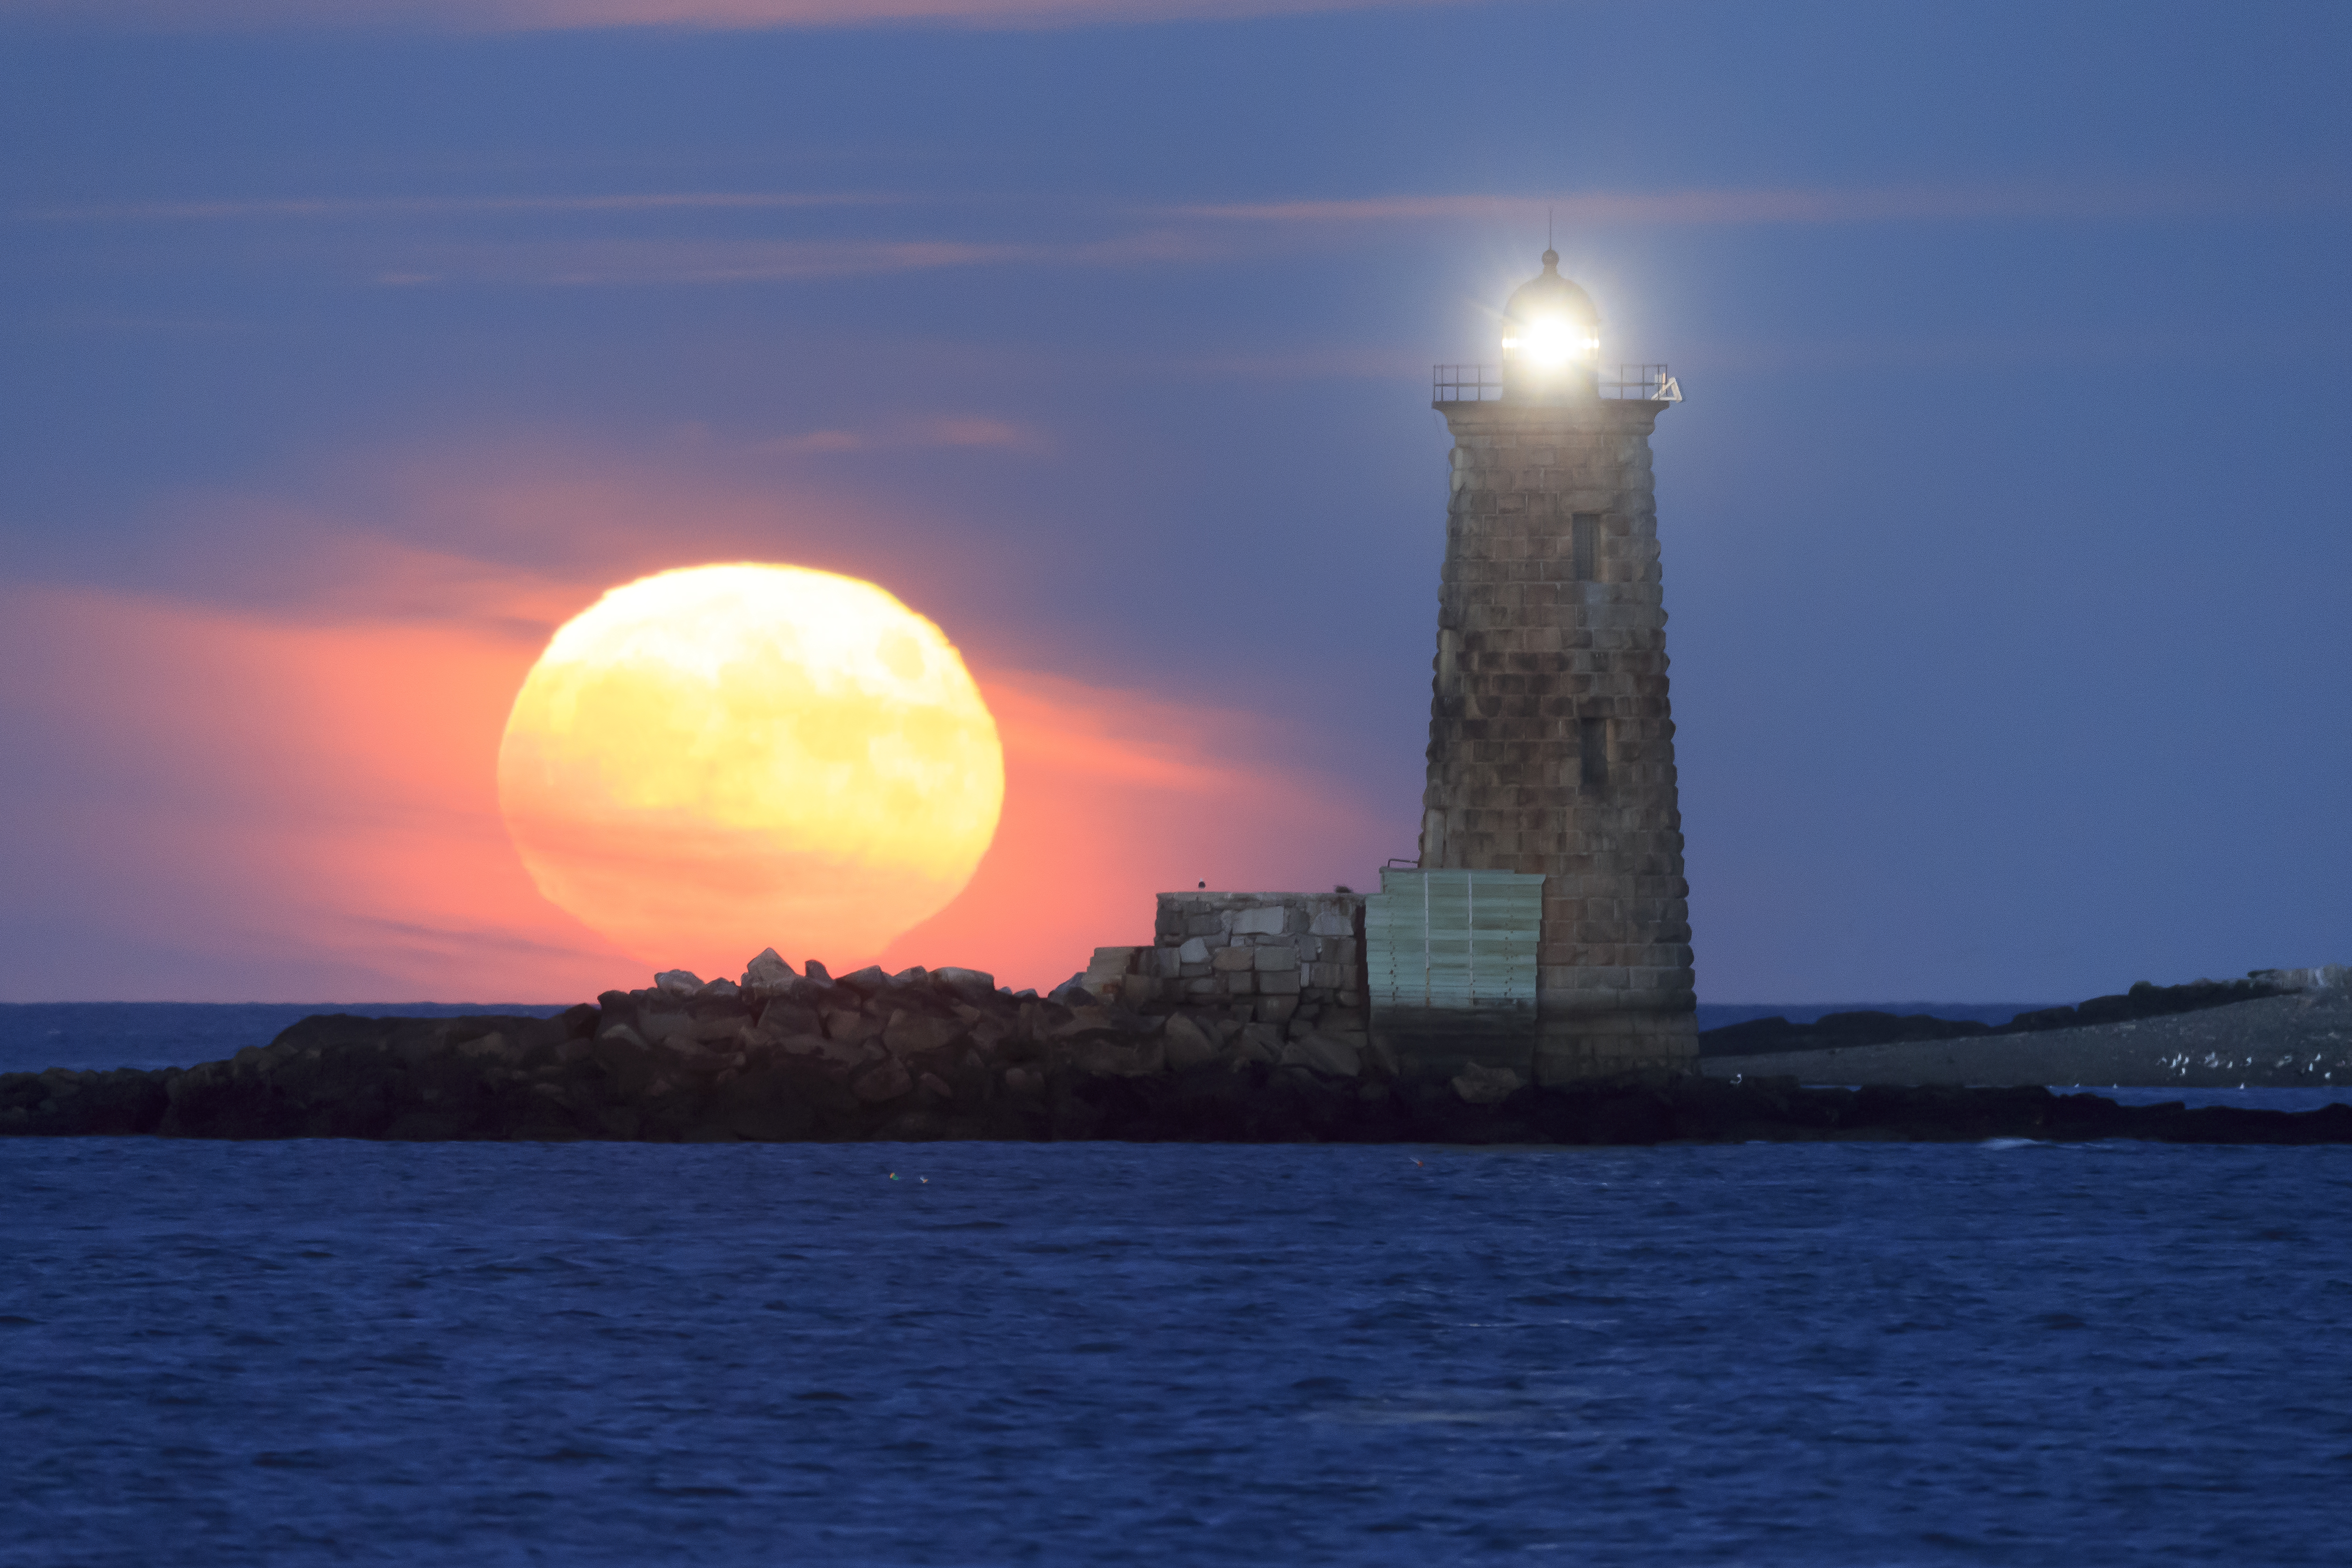
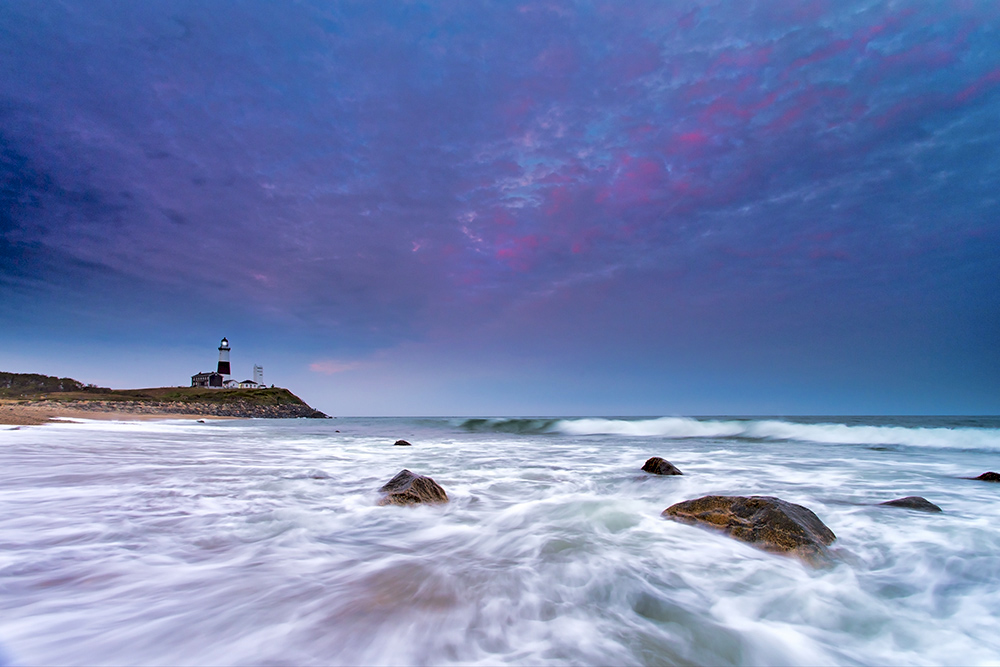
Light has a spectral rhythm. Blue hour compresses contrast and cools the scene; golden hour warms the palette and lifts micro-contrast; neutral noon can be graphic and honest when used intentionally. In this lighthouse frame, blue hour’s cooler spectrum simplifies relationships—water and sky harmonize—while lingering warm windows provide a complementary counterpoint. Instead of asking “Is it sunrise yet?” ask “Which spectral phase am I composing with?” That cycles-first question threads through my Nature Code.
In the field, I’ll shoot a neutral WB for maximum data, then grade cool or warm in post to preserve the subtle tonal steps that make prints sing. Blue hour favors long exposures and calm water—think mirror symmetry and quiet mood—while first warm light is perfect for grazing light on grasses, dunes, and masonry. Even midday has a role: use it for high-key seas, bold shadows, or clean behavior studies when animals are relaxed at range. You’ll see all three spectral phases echoed across my Landscape Gallery.
For wildlife, color temperature informs ethics and mood. Blue hour can extend calm behavior windows—lower contrast, gentler posture—while golden hour adds shape and separation without pressure. I keep working distances long with the 800mm, letting spectrum and angle—not proximity—build intimacy. That restraint is visible in the files throughout the Wildlife Gallery, where breath, rim, and reflection are all rendered by phase rather than chase.
Printing note: spectral phase guides paper choice and display light. Blue-hour images often love neutral-to-cool papers and indirect lighting; golden-hour frames can sing on slightly warmer stocks and under warmer room light. If you collect, browse related pieces and the care notes in my Hang, Light & Care guides to match print to viewing environment.
Water & Surface Cycles: Mirror, Ripple & Specular
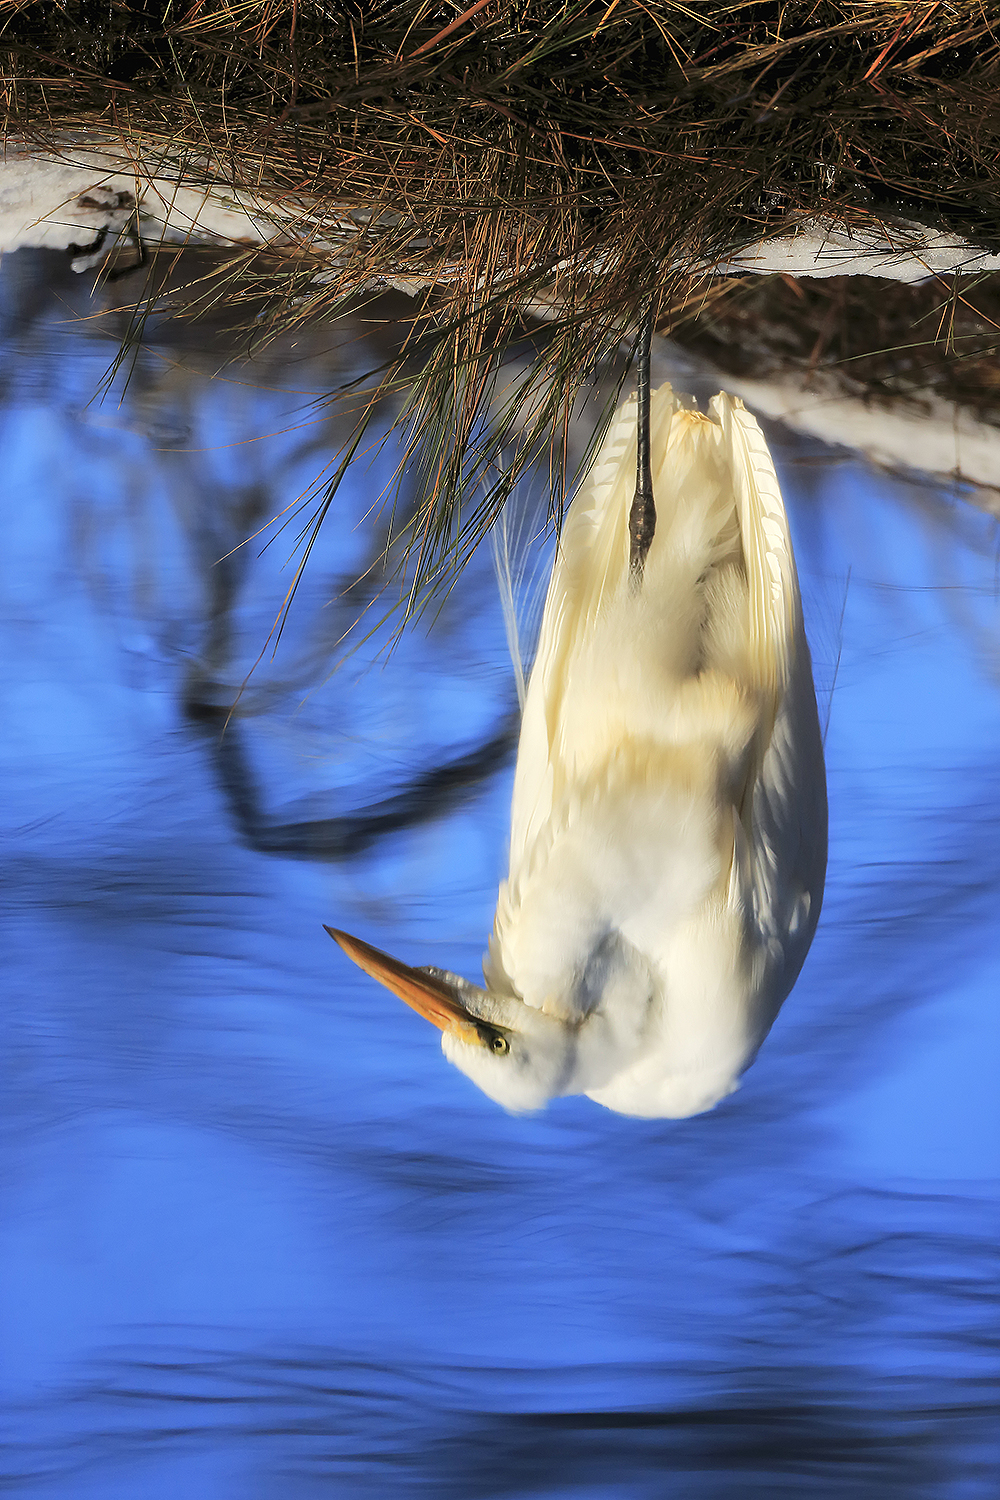
Water wears the light it’s given. At 0–2 knots of wind, surfaces act like mirrors—perfect for symmetry and quiet mood. At 3–6 knots, micro-waves break into specular sparkle that turns backgrounds into bokeh constellations. Above that, pattern gives way to abstraction. With this egret, I waited through a brief wind lull to let the shallows glaze over, then used a slight angle change to steer glare into glow. The surface state is a cycle of its own—read it first, compose second—an approach consistent with the “phase, not clock” mindset in my Nature Code.
Angle is everything. A few inches of camera height or a small lateral step will flip harsh reflection into luminous tone. I’ll often drop to a low shooting position so the background recedes and the water plane becomes a clean field for the subject. With wildlife, I let the 800mm do the proximity—no shoreline creep, no flushed fish or birds. You’ll feel that calm, unforced intimacy across my Wildlife Gallery, where reflections and rim light are earned by distance and patience.
Technically, meter for the highlight edge on the water or plumage, not the brightest specular dot (which can clip harmlessly). If sparkle is the story, allow a controlled roll-off in the brightest points; if mirror is the story, guard the highlight shoulder and use a polarizer only when it clarifies rather than sterilizes the surface. In prints—see related coastal and wetland pieces in the Landscape Gallery—specular scenes love papers with a touch of gloss, while mirror scenes can sing on neutral matte stocks under soft room light.
Field routine: arrive a phase early, watch flags and reeds to judge wind micro-changes, pre-visualize both mirror and sparkle versions, and make tiny angle adjustments rather than physical approaches. When the surface cycle clicks, the water becomes your collaborator—composing with you, not against you.
Sensor Cycle: Dynamic Range, ETTR & Highlight Discipline
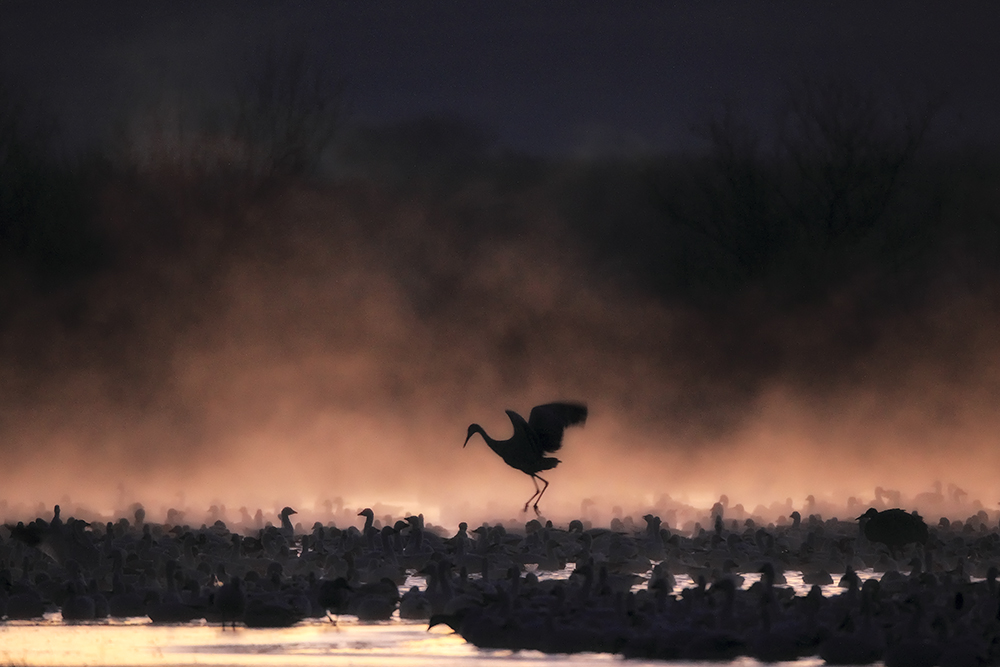
Nature’s light flows in cycles—but so does your sensor. In backlit or high-contrast scenes like this crane, the exposure game is about protecting the highlight edge—that thin, electric line where feather barbs glow. I bias toward an ETTR mindset (Expose To The Right) while guarding critical specular detail. In practice: ride exposure so the histogram approaches the right wall without clipping the tones you care about, then let inconsequential pinpoints (water diamonds, tiny sun glints) clip if the story isn’t in them. This highlight discipline yields files that breathe on paper across my Landscape and Wildlife galleries.
Distance preserves behavior; stability preserves tonality. I work primarily with longer lenses so the crane stays relaxed, then stabilize (tripod/ground pod/IS) to keep micro-contrast intact at sensible ISOs. If the light is edgey, I’ll dial a touch of negative exposure compensation (−0.3 to −0.7) to save the rim, knowing I can lift clean shadows later. If the light is flat, I’ll nudge exposure up to thicken the midtones. Either way, the aim is a flexible raw file—true to the scene and honest to the animal—matching the transparency ethos in my Ethical Fieldcraft Playbook.
Autofocus loves edges—so give it edges. In rim scenarios, place AF on the lit fringe or a high-contrast transition (eye line, bill/sky boundary). Consider a slightly faster shutter than you think you need; backlit wings exaggerate motion and small blurs multiply at long focal lengths. When highlights are secure, refine shadows with gentle local lifts rather than global punches—your print will thank you with smoother gradations and cleaner color.
Field routine: meter for the glow (not the fog), watch the RGB histogram not just luminance, bracket a conservative series if the scene is peaky, and keep stance changes micro. Let the sensor’s “cycle” dovetail with the light’s cycle; when both align, you get feather fidelity, believable sparkle, and a file that carries from screen to paper without heroics.
Wildlife Rhythm Cycle: Feeding, Resting, Courtship & Migration
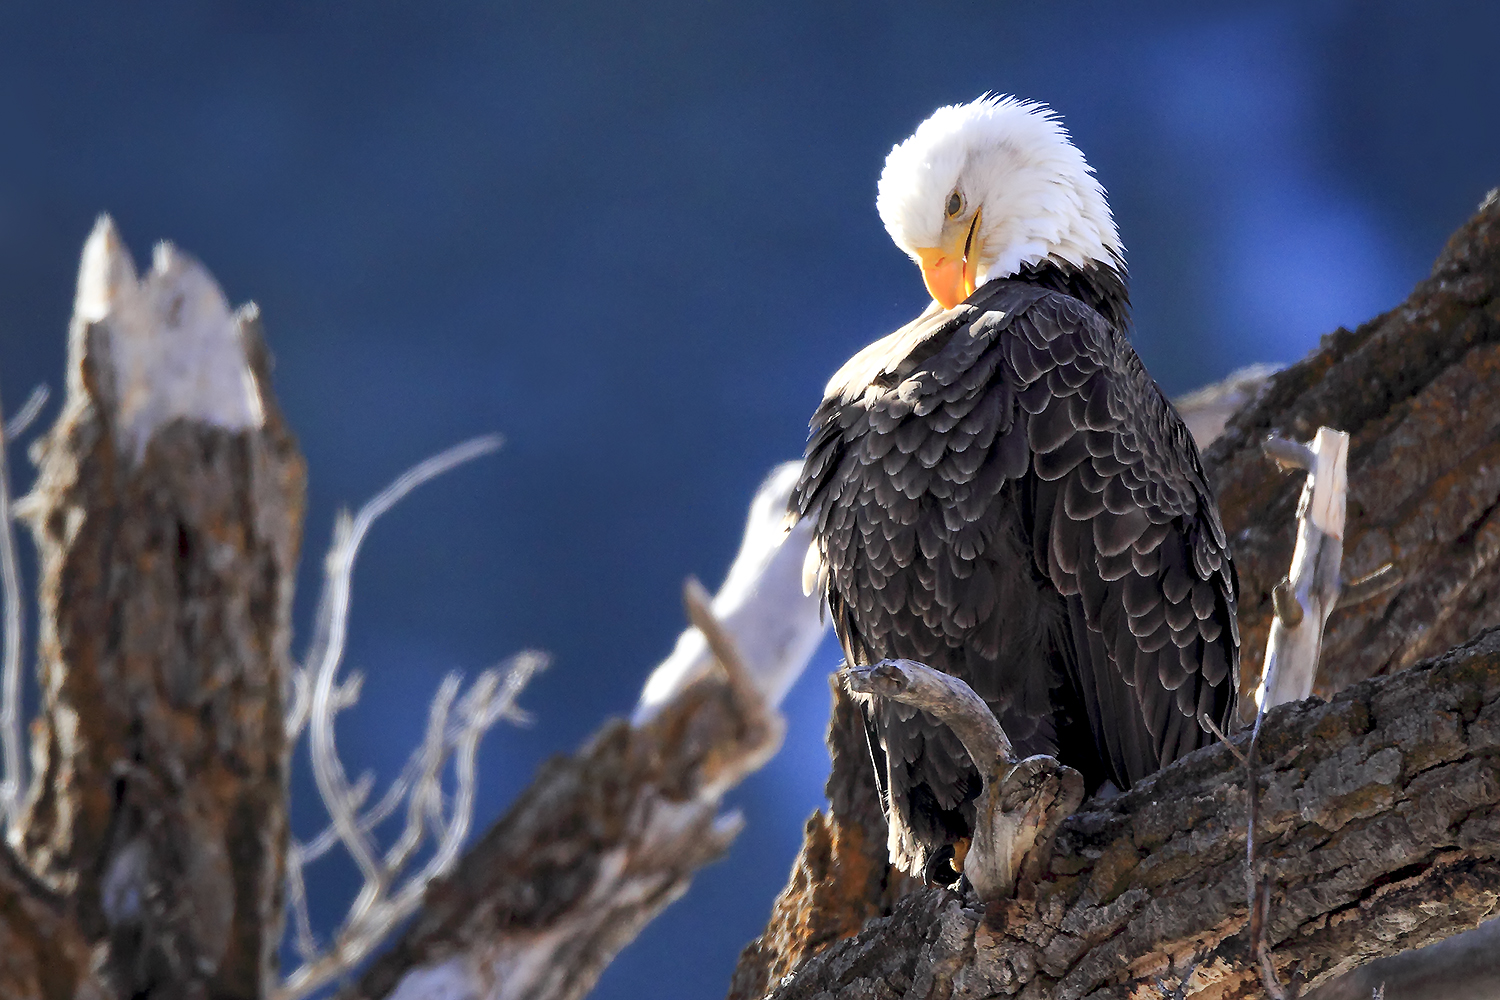
Light mastery is hollow if it ignores the animal’s daily rhythm. This backlit Bald Eagle isn’t posed—it’s preening, a maintenance behavior that signals comfort. I planned for the phase window when roosted birds often groom: low sun for rim and a likely lull after early feeding flights. Working from generous range with a telephoto lens allows the posture to remain baseline while the light does the styling—feather barbs glow, the bill arcs into the beam, and the image reads “unbothered.” You’ll see this quiet cadence echoed throughout my Wildlife Gallery.
Think in behavior windows. Feeding favors edges of day when contrast is gentle and animals are active; resting favors mid-morning or lee-sides of wind; courtship has seasonal and diurnal peaks; migration compresses activity into weather and tide opportunities. Stack those rhythms with light cycles—solar angle, moisture, wind lulls—and you get scenes that feel inevitable. This is the “cycles not clocks” principle from the Nature Code: when multiple cycles align, photographs make themselves and ethics become easier because you’re not forcing proximity to create drama.
Fieldcraft is choreography, not chase. I’ll choose a perch line or feeding corridor and arrive a phase early, then let the subject author the scene. If vigilance spikes (yellow flag) or displacement begins (red flag), I step back or break off entirely—respect first, image second, consistent with my Ethical Fieldcraft Playbook. The reward for restraint is behavior depth: preening sequences, feather sleeking, wing stretches, yawns—micro-stories the clock can’t predict but cycles can.
Practical notes: meter for the highlight edge on the lit mantle or bill; a touch of negative compensation (−0.3 to −0.7) protects rim detail. Keep stance changes micro—a small lateral step can refine backlight without collapsing distance. Caption with phase clues (resting/preening, post-feed lull, lee of wind) so viewers can feel the rhythm. These discipline layers are what make phase-made files carry gracefully into print and sit coherently alongside my Landscape Gallery work—the same cycles, different subjects, one field of light.
Compositional Cycle: Foreground, Midground & Background in Moving Light
Light isn’t static—so composition shouldn’t be either. I think in planes: foreground for context and glow, midground for subject and story, background for separation and tone. When the sun shifts or a cloud slides, one plane will “turn on” while another dims. Rather than chasing the clock, I wait for that plane alignment: a luminous grass fringe in front, a relaxed animal or clean ridge in the middle, and a darker, simplified background behind. You’ll see this three-plane choreography across both my Wildlife Gallery and Landscape Gallery.
With wildlife, I let my telephoto lenses compress planes ethically. A low shooting height brings a soft foreground veil into play (dew, snow, river sheen) while throwing the background far enough to melt distractions. Tiny micro-moves—a step left, a knee lower—can flip a busy tangle into a dark, buttery backdrop, or angle a sun patch so it kisses the subject without blasting the scene. The animal’s behavior stays baseline because I’m not closing distance; I’m shaping planes from where I already stand, consistent with the restraint in my Ethical Fieldcraft Playbook.
For landscapes, I’ll pre-visualize which plane should carry the light. If the background mountain holds the beam, I keep the foreground quiet and use leading textures sparingly. If the foreground is glowing (frost, wildflowers, tide foam), I anchor the subject in the midground and let the background go graphic. Edges matter: avoid merging bright subject edges into bright backgrounds; a half-step can restore edge contrast and readability. This is plane discipline you can spot throughout my prints in the Landscape Gallery.
Printing amplifies plane choices. Foreground glow wants gentle local contrast; background simplification wants smooth gradients that won’t posterize. If you’re collecting, match plane emphasis to room light and viewing distance—bigger pieces tolerate richer foreground texture; smaller pieces benefit from cleaner backgrounds. My sizing notes in the Print Size & PPI Advisor and Hang, Light & Care guides help align composition with display so phase-made files sing on the wall, not just the screen.
Field Routine: Scouting, Stand Time & Patience Windows
Light mastery becomes repeatable when your routine is cycle-based. I start with a scouting list that tags locations to phases: blue hour symmetry, first rim for breath and frost, post-sun haze for micro-contrast, edge-of-storm beams, and tide or moon glitter paths. Each spot gets a primary light idea plus one backup polarity (back/side/front) so a small lateral move can salvage a session. This “phase board” mirrors the cycles mindset I write about in the Nature Code—you’re planning windows, not timestamps.
I arrive one phase early and build in stand time so wind can ease, wildlife can normalize, and the atmosphere can set. From a fixed perch, I make micro-moves to refine planes and polarity rather than closing distance. Working primarily with telephoto lenses keeps posture baseline and behavior calm—a throughline you can feel across my Wildlife Gallery. If vigilance ticks up (yellow flag), I pause or step back; if displacement begins (red flag), I end the session. Respect first, image second—consistent with the Ethical Fieldcraft Playbook.
The patience window is where cycles stack: a lull aligns with low sun; fog lifts just enough for beams; a tide pauses at slack; a front cracks open a horizon slot. I meter for the highlight edge that carries the story (rim on fur, glitter line, cloud beam) and keep stance changes tiny to preserve background simplicity. If the window closes, I pivot—blue hour abstracts, rain-polished color, or behavior studies in frontlight. The goal is fewer, cleaner frames that print gracefully in both the Landscape Gallery aesthetic and wildlife narratives.
Exit like you entered: along the same line, slowly, and without pushing animals toward roads, cliffs, or predators. Note how the cycles played—wind thresholds, sun angles, moisture behavior—and update your location cards. Over time, those notes become your personal almanac: a living map of phases that turns “luck” into a dependable fieldcraft rhythm.
Case Study: One Scene, Three Cycles
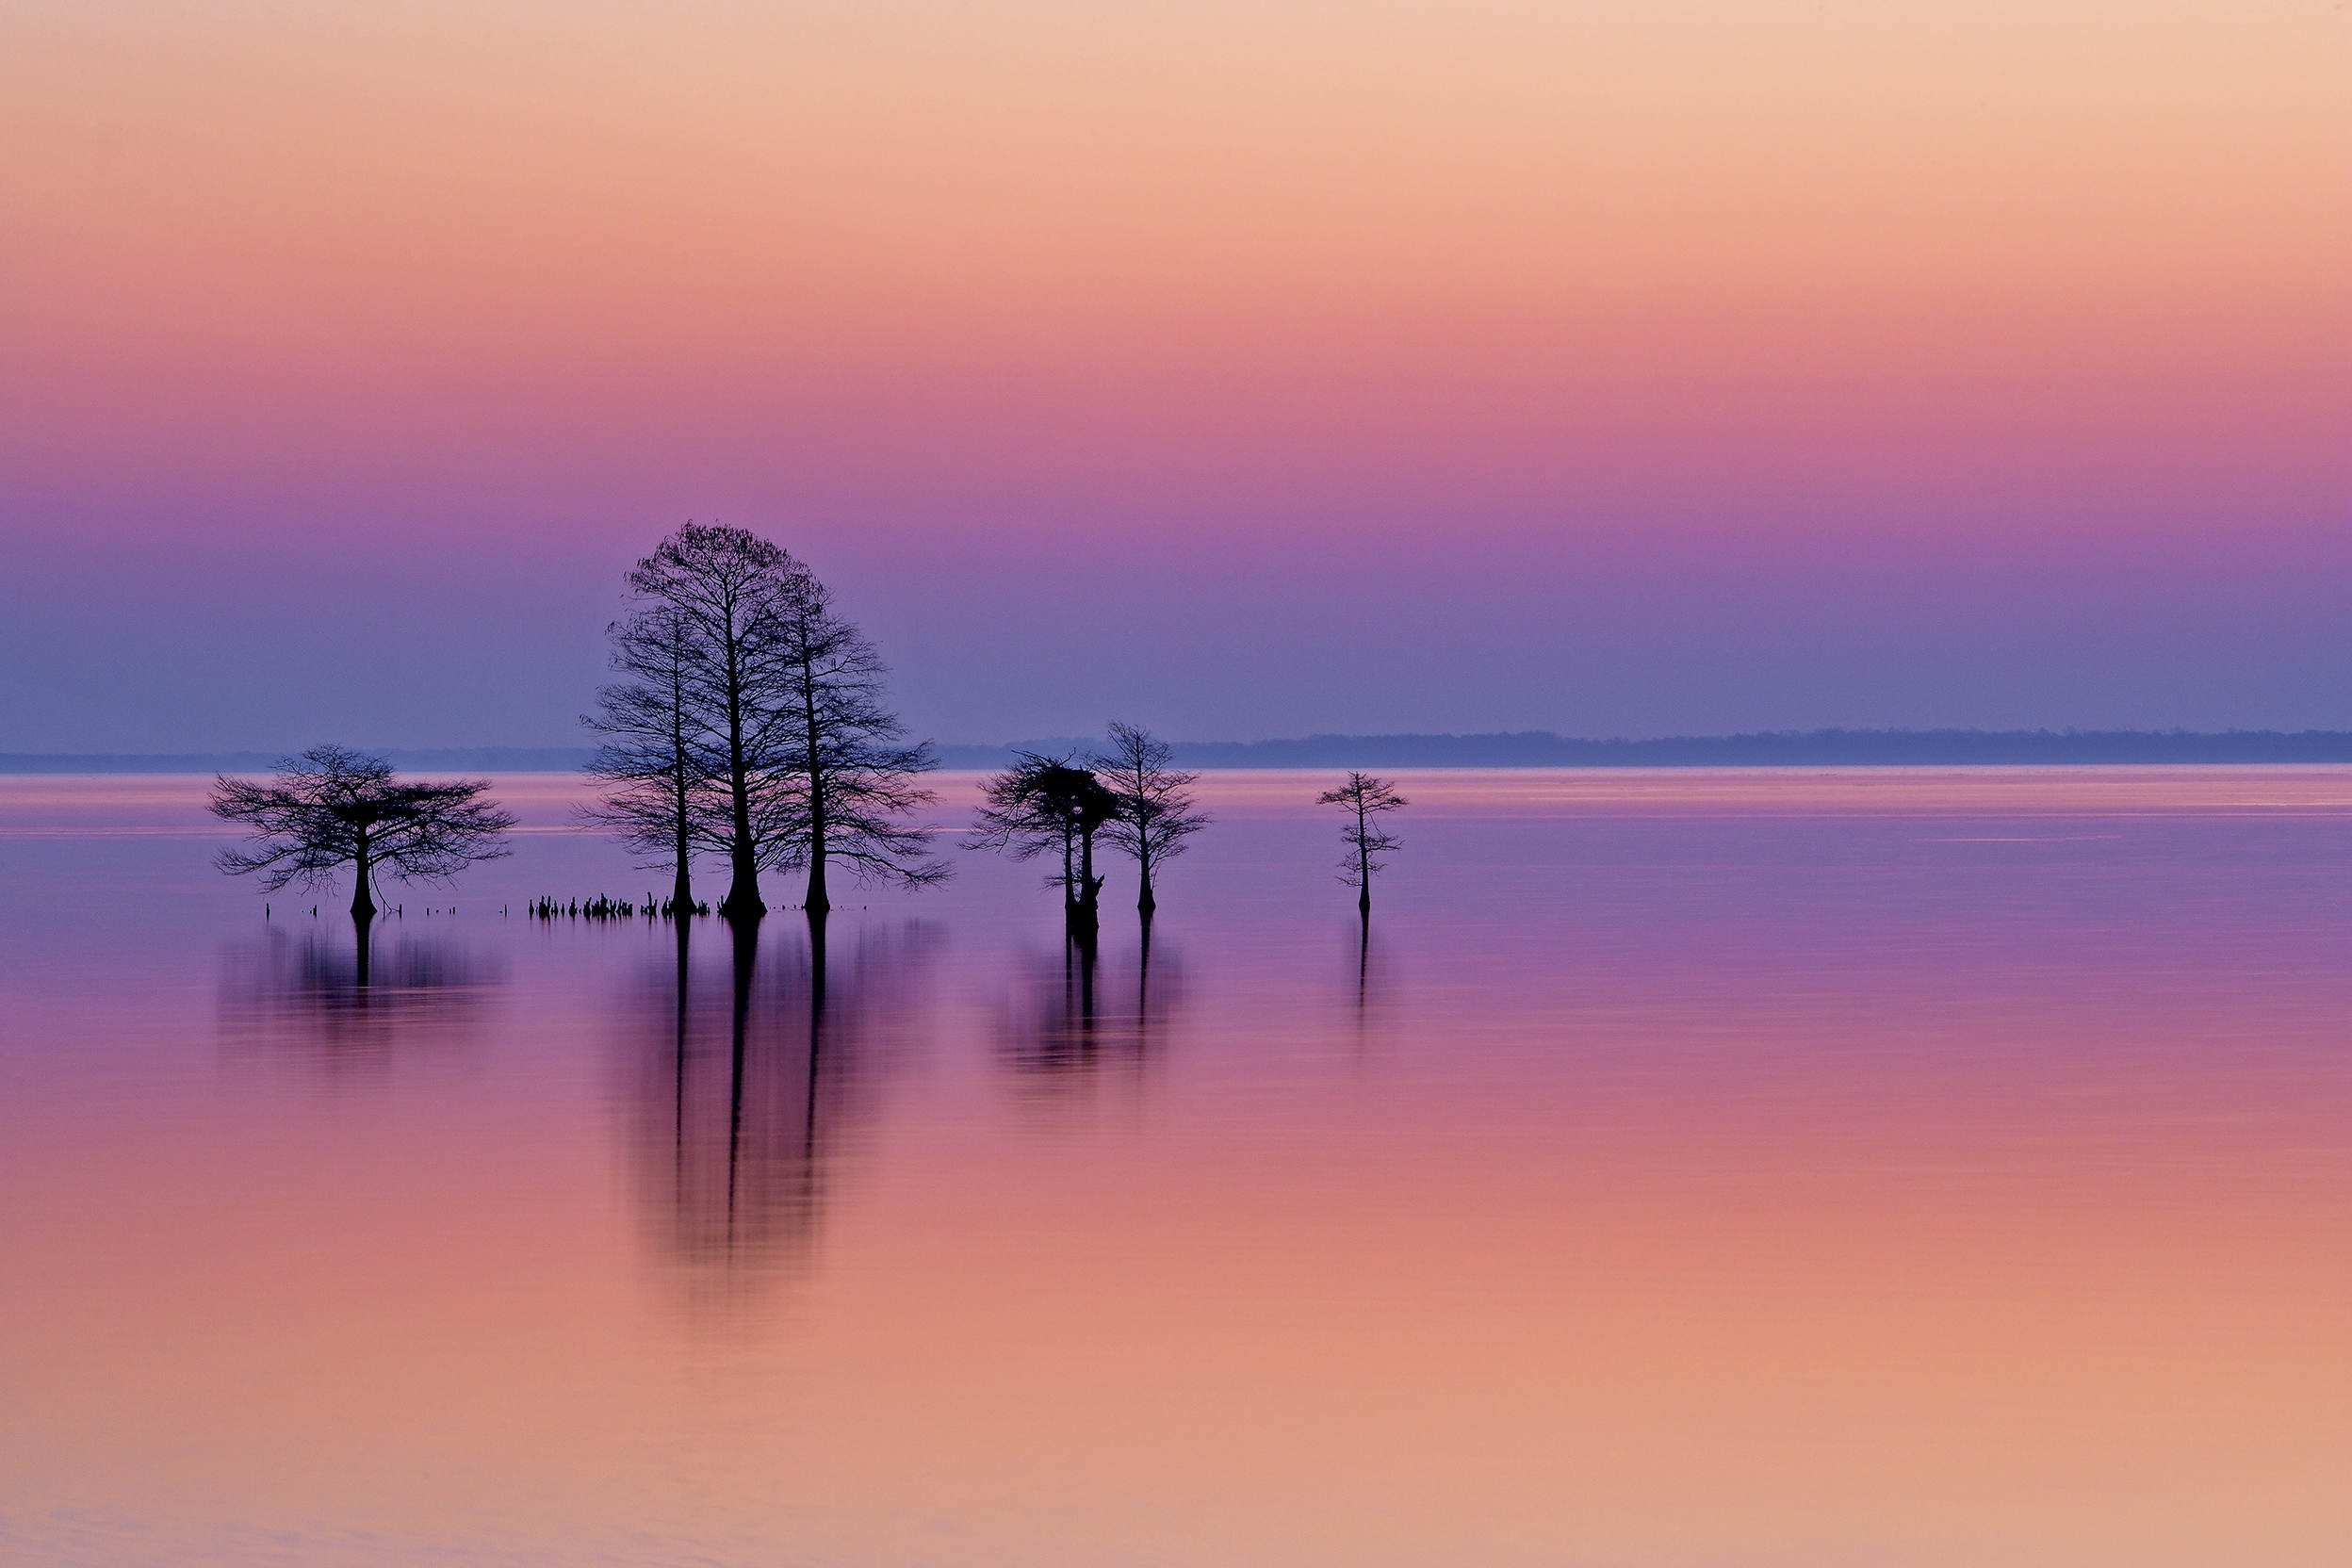
One location, three different stories—chosen by phase, not clock. At Lake Mattamuskeet, I planned a trio of interpretations: (1) civil blue hour for quiet symmetry, (2) first rim for edge-lit reeds and faint mist, and (3) post-sun haze for saturated warmth and softened contrast (pictured here). The camera didn’t move far; the light cycle did the heavy lifting. When you pre-visualize phase paths, composition starts to feel inevitable—small lateral steps refine planes while the story changes with the spectrum and angle. This cycles-first mindset underpins my Nature Code.
In the blue-hour version, I’d keep foreground reeds minimal and lean into mirror water; a neutral white balance preserves delicate tonal steps that print beautifully on neutral-to-cool papers. In the first-rim pass, the goal is micro-contrast: rim the grasses, protect highlight edges, and use a low height to push the background distant. In the post-sun haze (this frame), color density rises and texture smooths—perfect for a calmer print that pairs well with warm room light. You’ll see these three “reads” echoed across my coastal and wetland work in the Landscape Gallery.
Technically, I meter for the brightest intentional highlight (the thin glow on water or cloud base), not the specular specks that can clip without consequence. A slight negative exposure compensation (−0.3 to −0.7) preserves that shoulder; shadows can be lifted gently later. If breeze tickles the surface, I wait for a wind lull to reclaim mirror calm—or embrace 3–6 kt sparkle for a bokeh field. These are the same surface cues I outlined earlier, and they translate directly into print latitude and paper choice.
If wildlife enters the scene—egrets, ducks, or swans—I keep position and let the phase do the styling from a respectful distance. Behavior remains baseline, posture stays relaxed, and the file carries that calm into the final piece—aligning with the ethics I detail in the Ethical Fieldcraft Playbook. One place, three cycles, many prints—each honest to the light that made it.
Become a Student of Phases (Not Alarms)
Mastery arrives when you stop asking “What time is golden hour?” and start asking “Which phase is the land in?” Solar angle, moisture, wind lulls, season, tide, lunar lift, weather edges—each cycle is a dial you can read and stack. When two or three align, scenes feel inevitable: behavior is calm, edges are clean, and the file carries the quiet that viewers sense in print. This is the heart of my Nature Code: cycles over clocks.
Ethics are baked into this approach. I work primarily with an 800mm lens so light can sculpt from a respectful distance—no chase, no posture spikes, just baseline behavior illuminated by the right phase. That restraint is visible throughout my Wildlife Gallery and echoed in the calm, phase-made tones of the Landscape Gallery. When the light is honest and the animal unbothered, the photograph gains a kind of gravity you can’t fake later.
For collectors, phase awareness travels home with the print. Blue-hour serenity loves neutral-to-cool papers and indirect room light; golden-hour warmth sings on slightly warmer stocks and gentle directional light. If you’re planning a wall, my sizing and display notes in the Print Size & PPI Advisor and Hang, Light & Care guides help align viewing conditions with the image’s spectral mood, so the piece feels alive at all hours—not just on screen.
Whether you’re studying behavior at distance or composing a quiet river bend, let the cycles lead. Arrive a phase early, choose an angle that fits two polarities, make micro-moves, and wait for the window to open. When it does, press once—light, land, and life will have already done most of the work.
Collect the Phase, Not the Moment
If this piece resonated, bring the feeling of phase-made light into your space. My prints are created at generous distances so posture stays calm and scenes breathe—then finished to sing under real room light. Explore more in the Wildlife Gallery and Landscape Gallery, and consult my Hang, Light & Care notes to match paper and display to your home’s light cycle.
Tip: warm, directional evening light complements golden-hour prints; indirect neutral light flatters blue-hour pieces. If you’d like sizing guidance, see the Print Size & PPI Advisor and Hang, Light & Care guides.
Frequently Asked Questions
1) What do you mean by “cycles not clocks”?
Light quality is driven by phases—solar altitude, moisture, wind lulls, weather edges, lunar/tide timing—not by a single timestamp. I plan around phase windows (blue hour, first rim, post-sun haze) and let the scene tell me when it’s ripe. This cycle-first mindset echoes my Nature Code essays.
2) How can I quickly “read” the sun’s angle in the field?
Watch shadow length and direction on grasses, rocks, and tree trunks. Long, directional shadows mean form and texture; higher sun shortens shadows and flattens relief. Pick a polarity (back/side/front) that matches your story, then make micro-moves to refine it. For landscape examples, browse the Landscape Gallery.
3) Any tips for fog, haze, and atmospheric beams?
Scout for water bodies, a cool night/warm dawn (delta T), terrain that funnels mist, and a brief wind lull. Expose for the highlight edge (beam rim or frosted branch), not the fog body. Small lateral shifts tame flare without losing glow. This approach features throughout my Landscape Gallery.
4) How do lunar and tide cycles influence coastal images and wildlife?
Full/near-full moon can be a workable key light; tide state dictates reflections, texture, and feeding windows. I pre-visualize moon azimuth/altitude and the tide curve, then arrive a phase early. For wildlife, I keep distances generous and movement minimal so behavior stays baseline—mirroring the ethics in my Ethical Fieldcraft Playbook.
5) Why do you emphasize an 800mm lens for wildlife light work?
Distance preserves behavioral baseline. The 800mm lets me “zoom with glass, not feet,” so I can change light polarity with tiny lateral steps instead of approaching. That restraint is visible in calm posture across my Wildlife Gallery.
6) How should I expose and process for print when working with phase-driven light?
Protect the brightest intentional highlight (rim on fur, glitter path, cloud edge) and allow inconsequential speculars to clip if needed. Shoot a neutral white balance, then grade subtly to preserve tonal steps. Blue-hour work loves neutral-cool papers and soft room light; golden-hour work sings on slightly warm stocks and gentle directional light. See my display notes in Hang, Light & Care and size guidance in the Print Size & PPI Advisor.
7) How do ethics intersect with “light mastery” in the field?
Calm behavior makes better light. I arrive a phase early, keep movement minimal, and rely on long focal length to avoid pressure. If vigilance rises, I pause or back off; if displacement begins, I end the session. Respect first, image second—more in the Ethical Fieldcraft Playbook.